Boeing 747 Edit - After All These Years!
Jul 02, 2024
By Raimo Roonet
A little origin story for my latest post with the 747 head-on shot.
It was back in 2012, I had bought my first DSLR just over 2 years before and was taking first cautious steps towards aviation photography. But even then I knew I wanted something more out of my aviation photos than just the nose-to-tail sideways crop most of the spotters are so fond of – sure, great for documenting the liveries and registrations but boring otherwise.
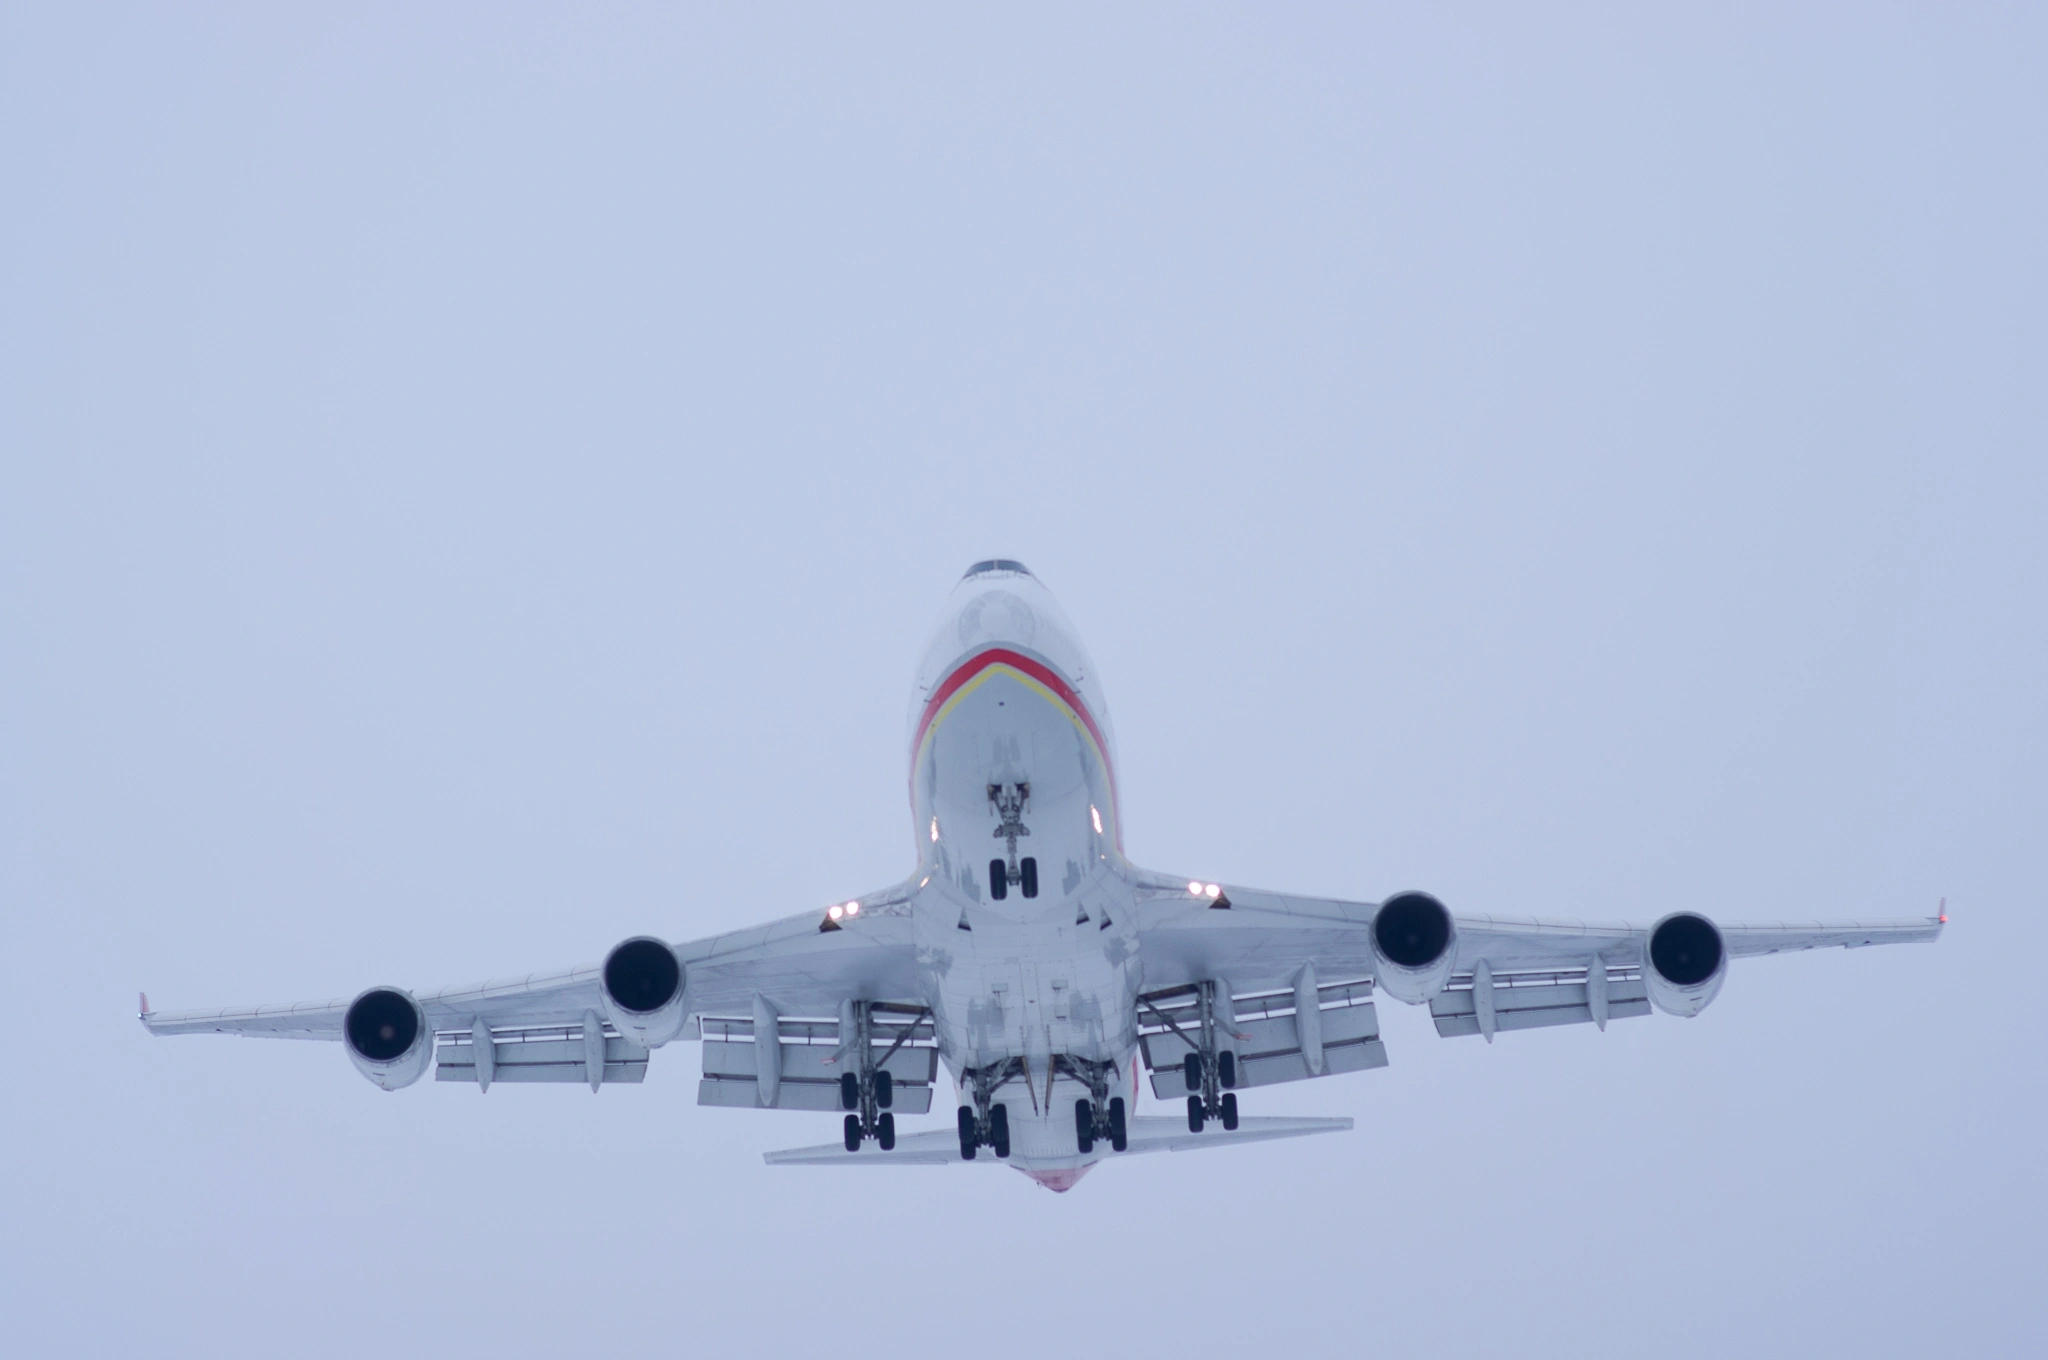
Arrival of a 747 is always a big event in Tallinn – they are not exactly regular here. So when I heard one was about to visit I planned to get a head-on shot under the final while everyone else had gathered to the side of the runway. I also had bought a new lens a few months ago which I was anxious to try out – a Samyang 85mm fix. In hindsight – what was I thinking? – It is a manual focus lens, and although it can be extremely sharp and with nice bokeh, nailing the focus through the viewfinder was almost impossible to pull off – and even more so with a moving subject like an airplane.
It was january, snow covered the ground and the ice on the lake under the final and the weather was typical washed out grey. So the shoot went as you would expect it to – light was terrible, colours as well and of course the shot was out of focus due to the manual focus plus a fair amount of purple fringing around the lights. But standing under that behemoth during landing, just a few hundred meters from the thereshold was still awesome experience.
Unedited shot
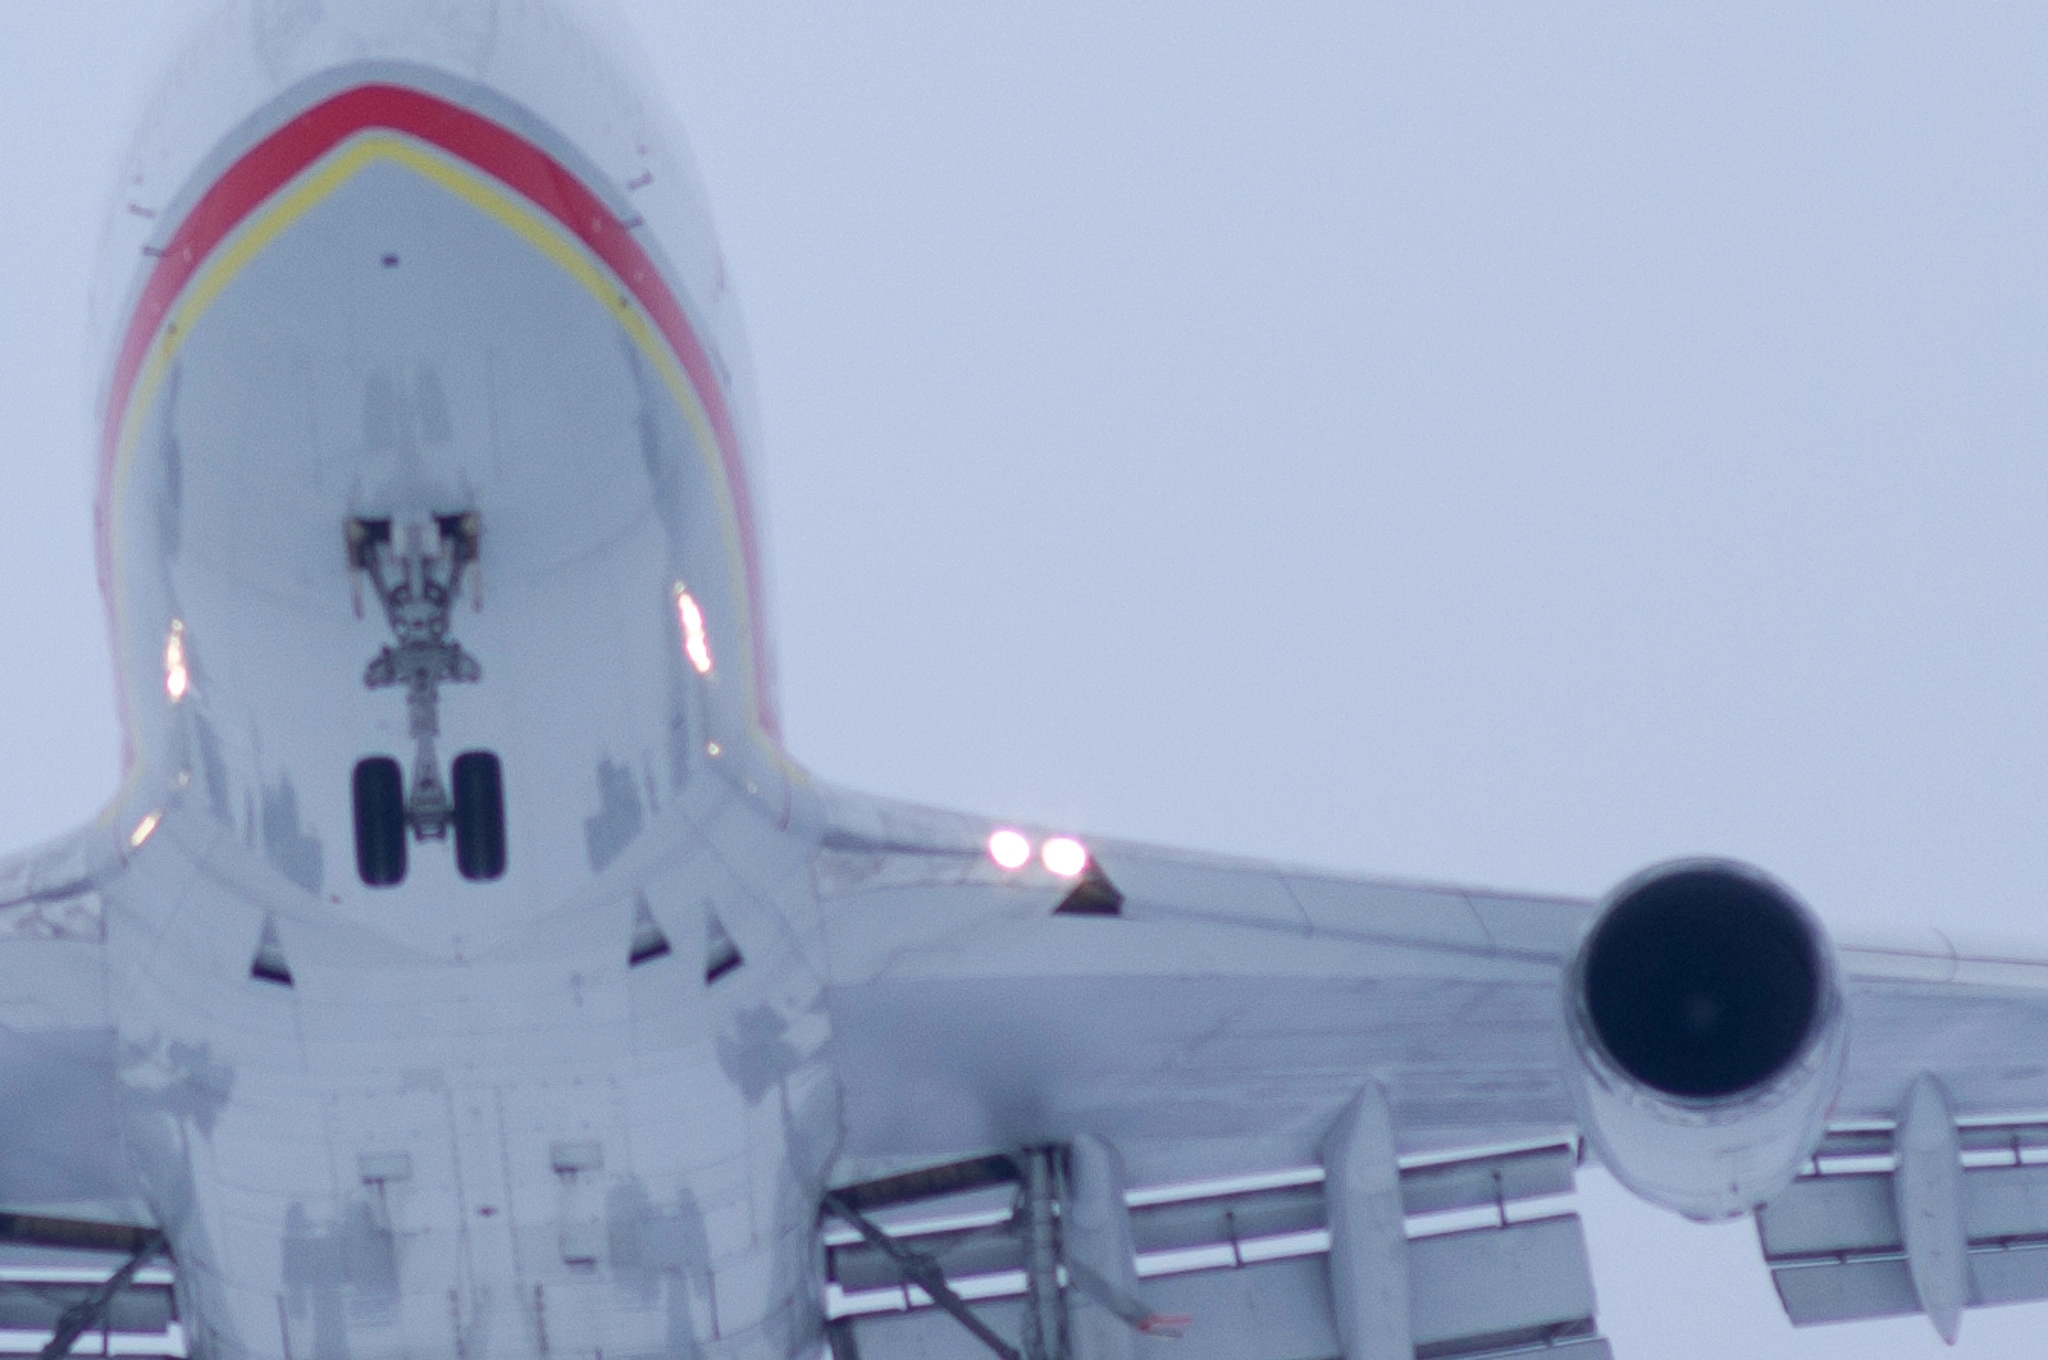
Crop of the unedited shot, showing the subject is out of focus and suffers from purple fringing.
Fast forward 12 years, I suddenly had the idea of sending the blurry file to Topaz and see what that could pull off.
Initial result was fairly promising, it managed to sharpen and clean up the image quite nicely.
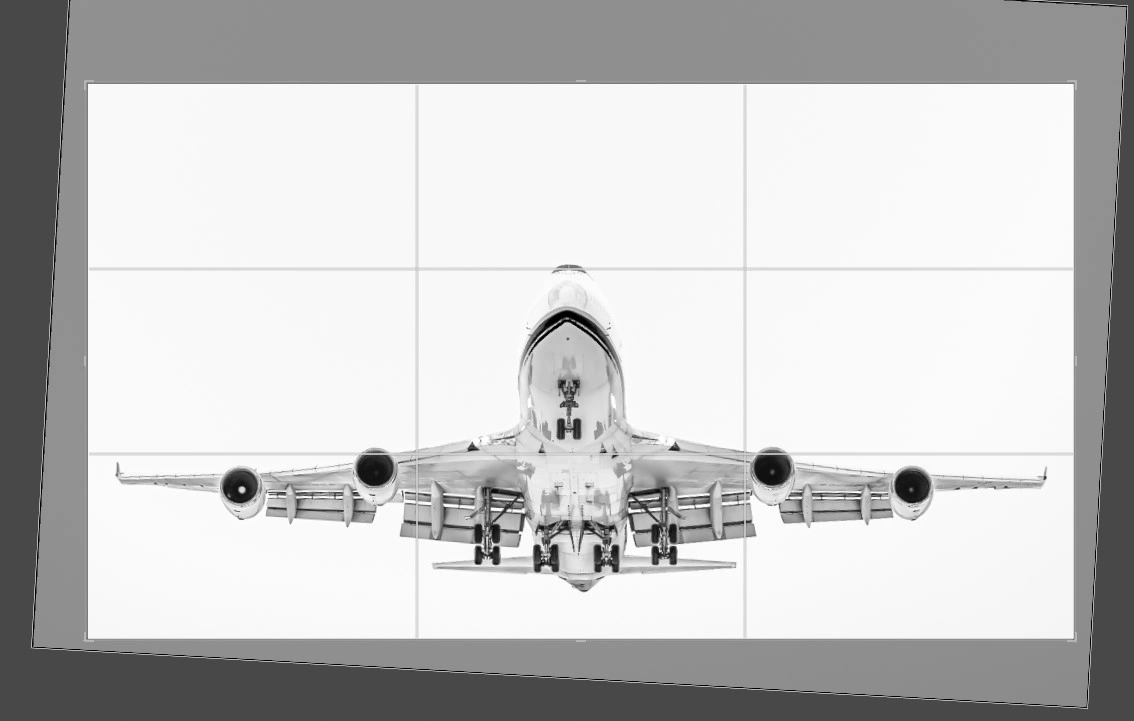
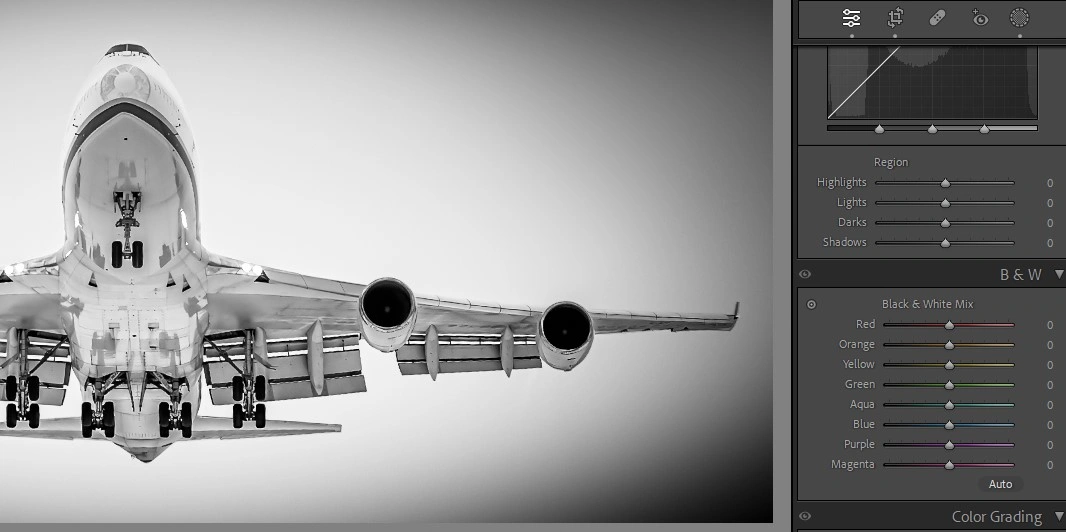
Bringing it back to LR I turned into B&W, straightened it up and adjusted the composition and started working on the light balance on the underside, basic stuff.
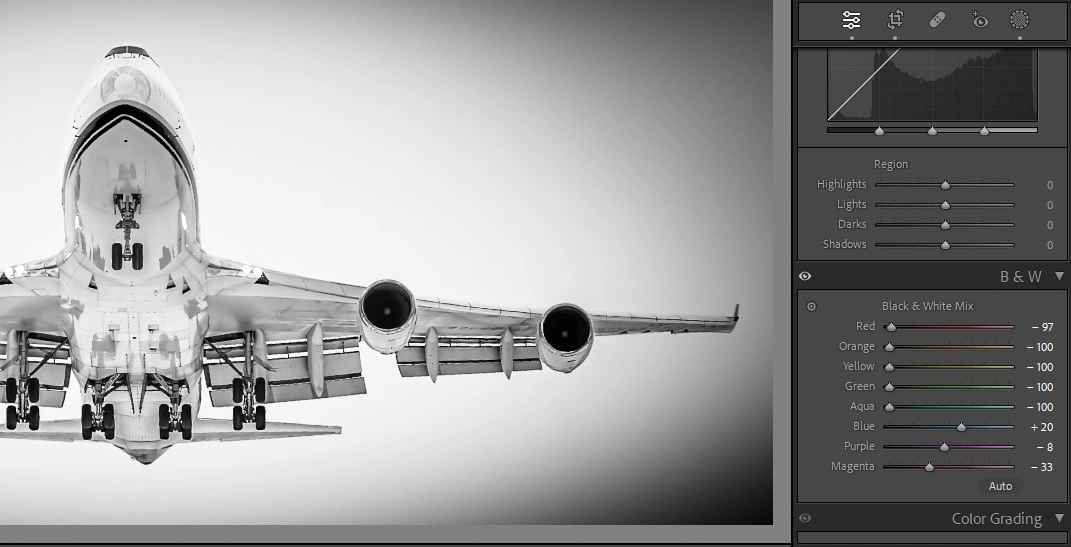
What seems to be often overlooked is managing colours in Black and White edits. Wait, colours? – But it is a B&W image, you say? Yes, colours – LR has a separate colour channel mixer under B&W edit module and that mixer actually gets worked harder in case of B&W images than during full colour ones. In this case the main difference is just in a few lines on the fuselage but it can really make a difference in some cases – try it out sometimes with yellows and greens when you have lots of grass in the background! Photographers during the B&W film era used physical colour filters for having that kind of control over certain coulour ranges in their images and it can really make your B&W pop!
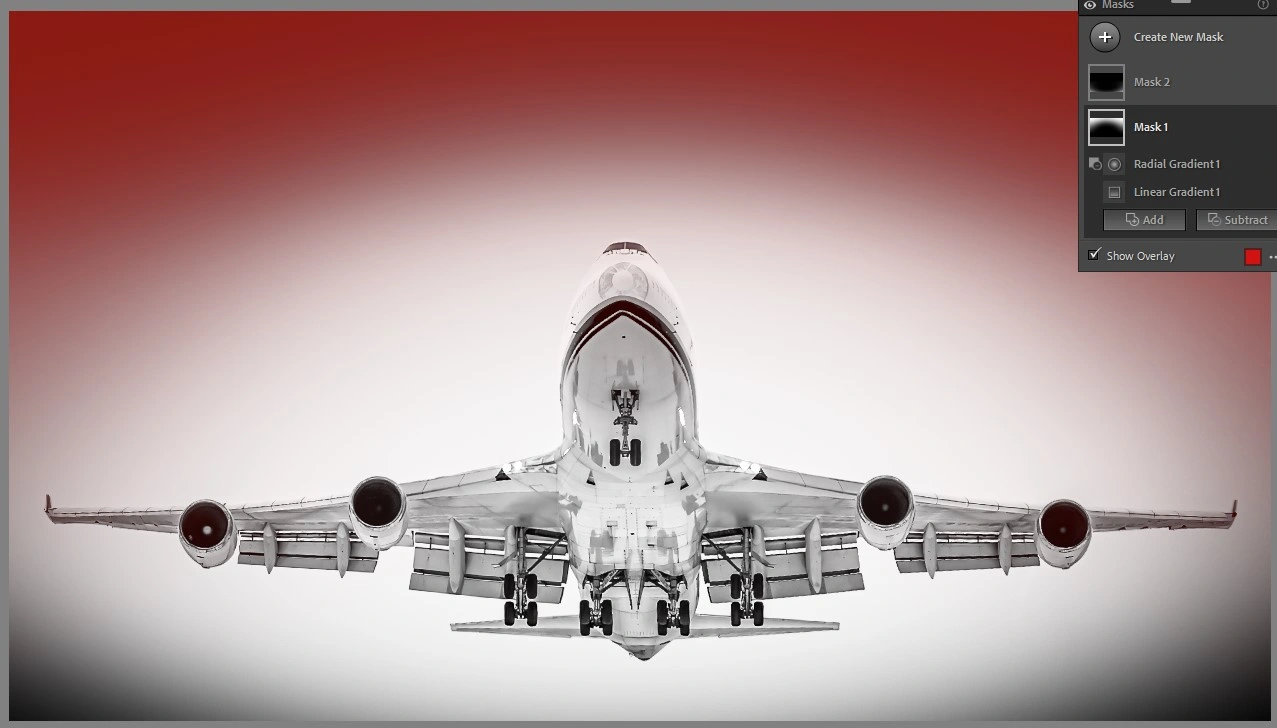
As the white fuselage and grey clouds blended together it was pointless to try and bring the plane out more, so I took the high-key road at first but as there was a lot of empty space which did not work fell for the composition.
The usual vignetting tool did not provide the necessary control over the image with this composition so I added two masks with similar concept:
First a linear gradient filter and then substracted a radial gradient from it to get this arching shape going for it.
Finally a presentable photo from a shot that was originally pretty much dumpster material. As the saying goes, one man’s trash is another man’s treasure – I guess us photographers can say one time’s trash is another time’s treasure.

Did you know our blogs are written exclusively by our members? We'd love for you to come and experience what COAP Online is all about!
Not yet a member?
Enjoy a free 30-day trial!
COAP Online membership brings 100s of aviation photographers from around the world together in a friendly, helpful and inspirational community. You'll enjoy monthly challenges, competitions, livestreams, blogs, exclusive discounts, meet-ups and more!
Get a free tutorial to your inbox every week!
Subscribe to our mailing list to receive a fantastic aviation photography tutorial to your inbox every Tuesday!
We hate spam as much as you. We will never sell your information, for any reason.