Going Round The Twist
Jul 01, 2024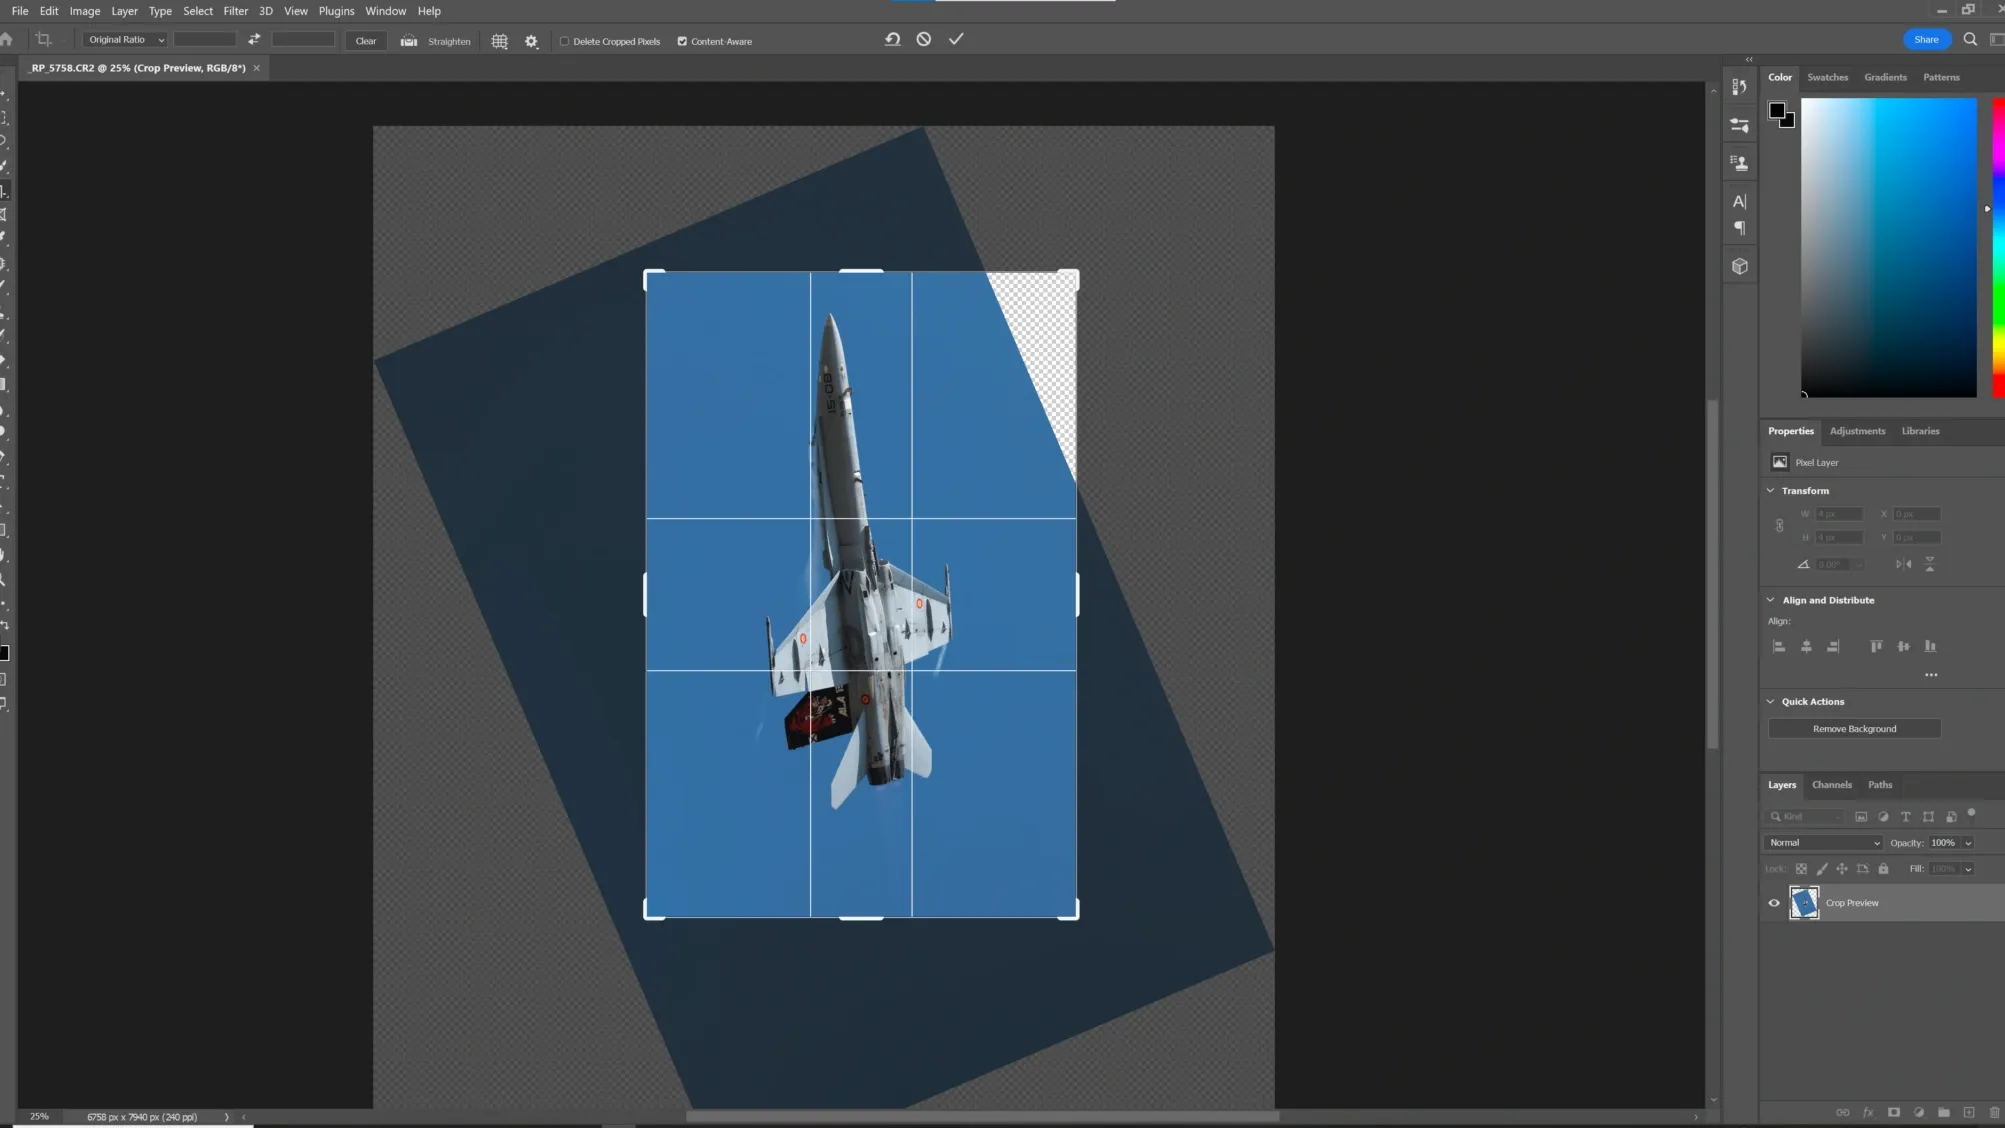
By Bradley Rogers
Sometimes I find myself wanting to push the boundaries of my creative edits a little further, whilst keeping in the realms of possibility. Maybe it’s a hint of boredom or a need to try something different. We can all achieve great and credible flying shots whether it be at Airshows or at the fence on a spotting trip. Sometimes I just want more. I thought I’d share with you all a slice of my creative workflow using an area that may often be overlooked, when wanting to take shots onto another creative level… Twist and Rotate!
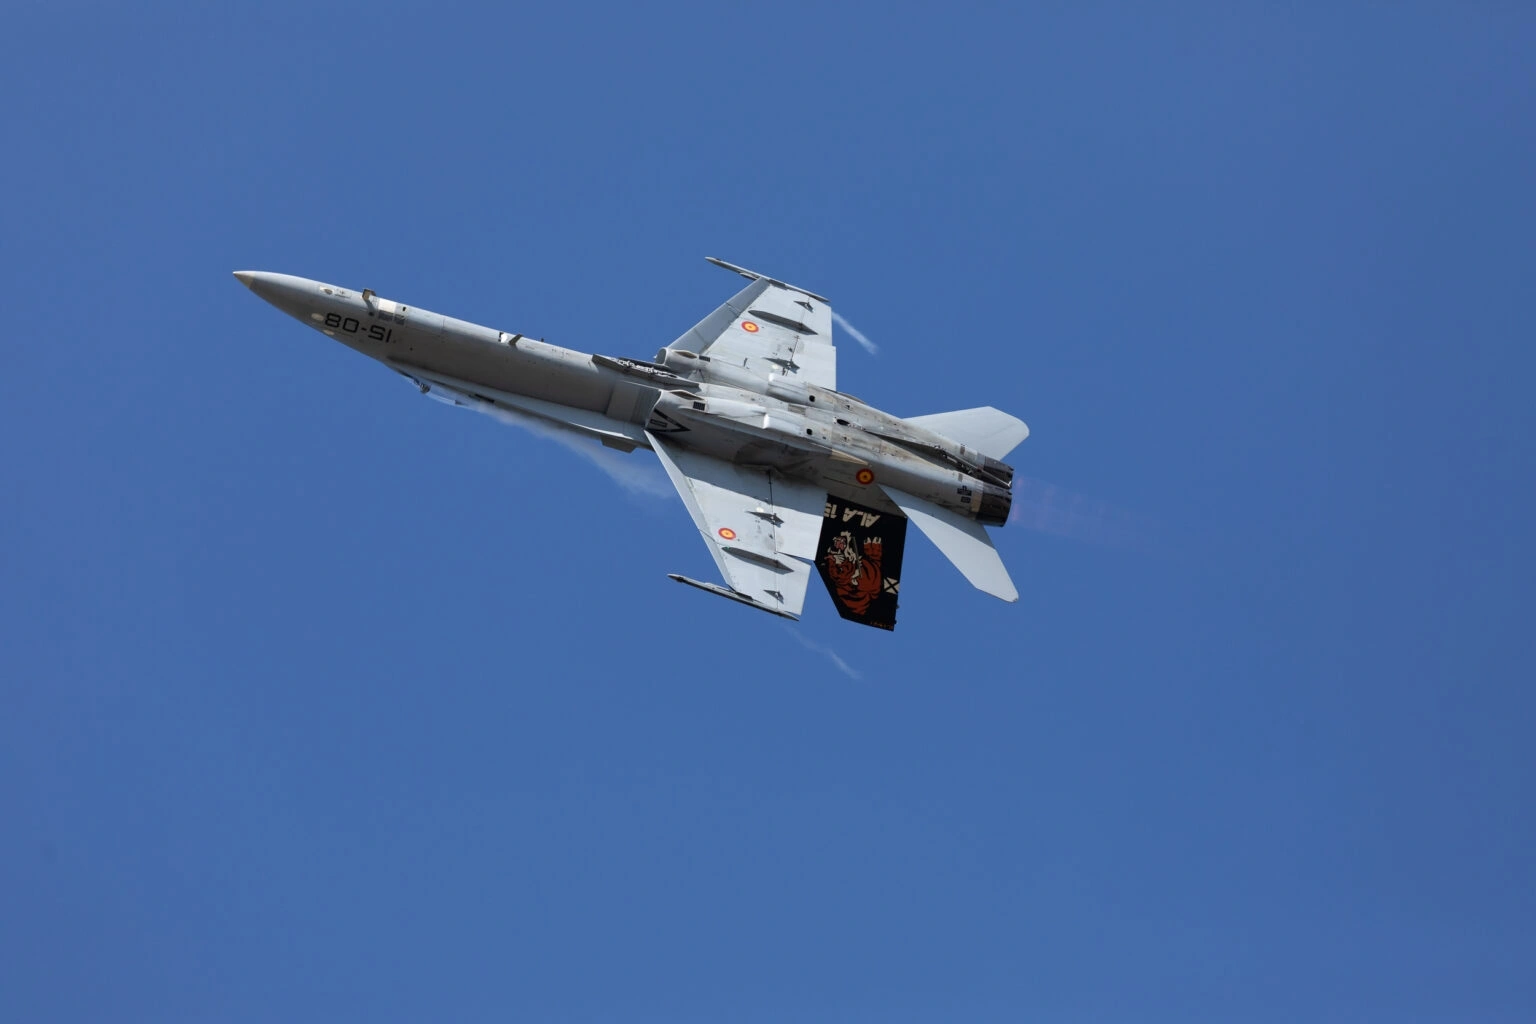
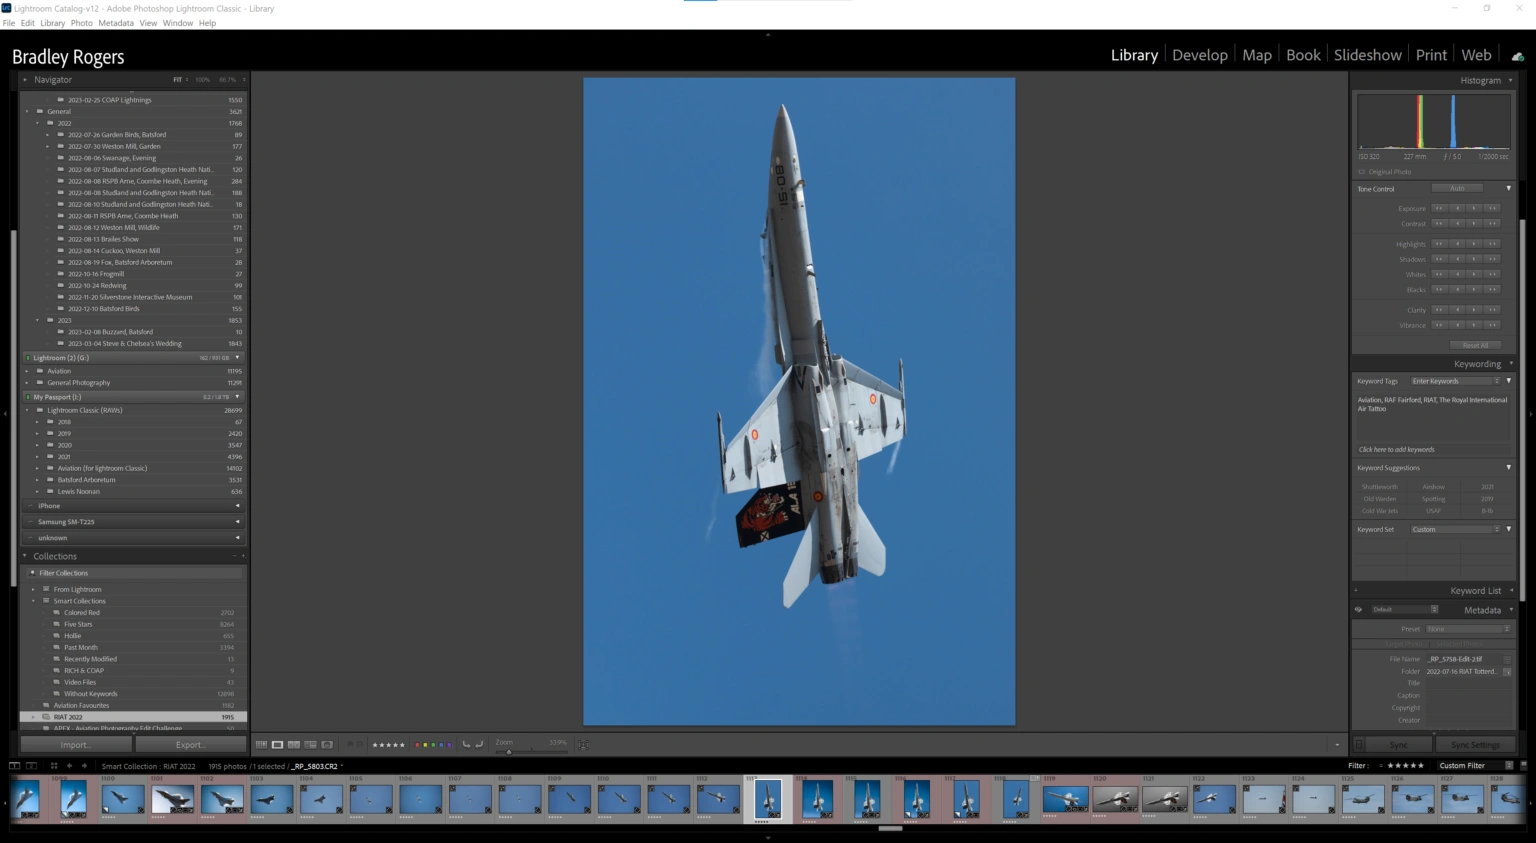
As you can see (above) this is an image of the Spanish EF-18 Hornet from The Royal International Air Tattoo 2022. Personally I like the shot, it’s sharp, I haven’t cropped any of the aircraft off by mistake and the exposure I’m pretty happy with. However, it’s certainly not without it’s flaws. For example it could be better composed, I would have needed more reach. Of course that’s where “Post-Processing” comes in…
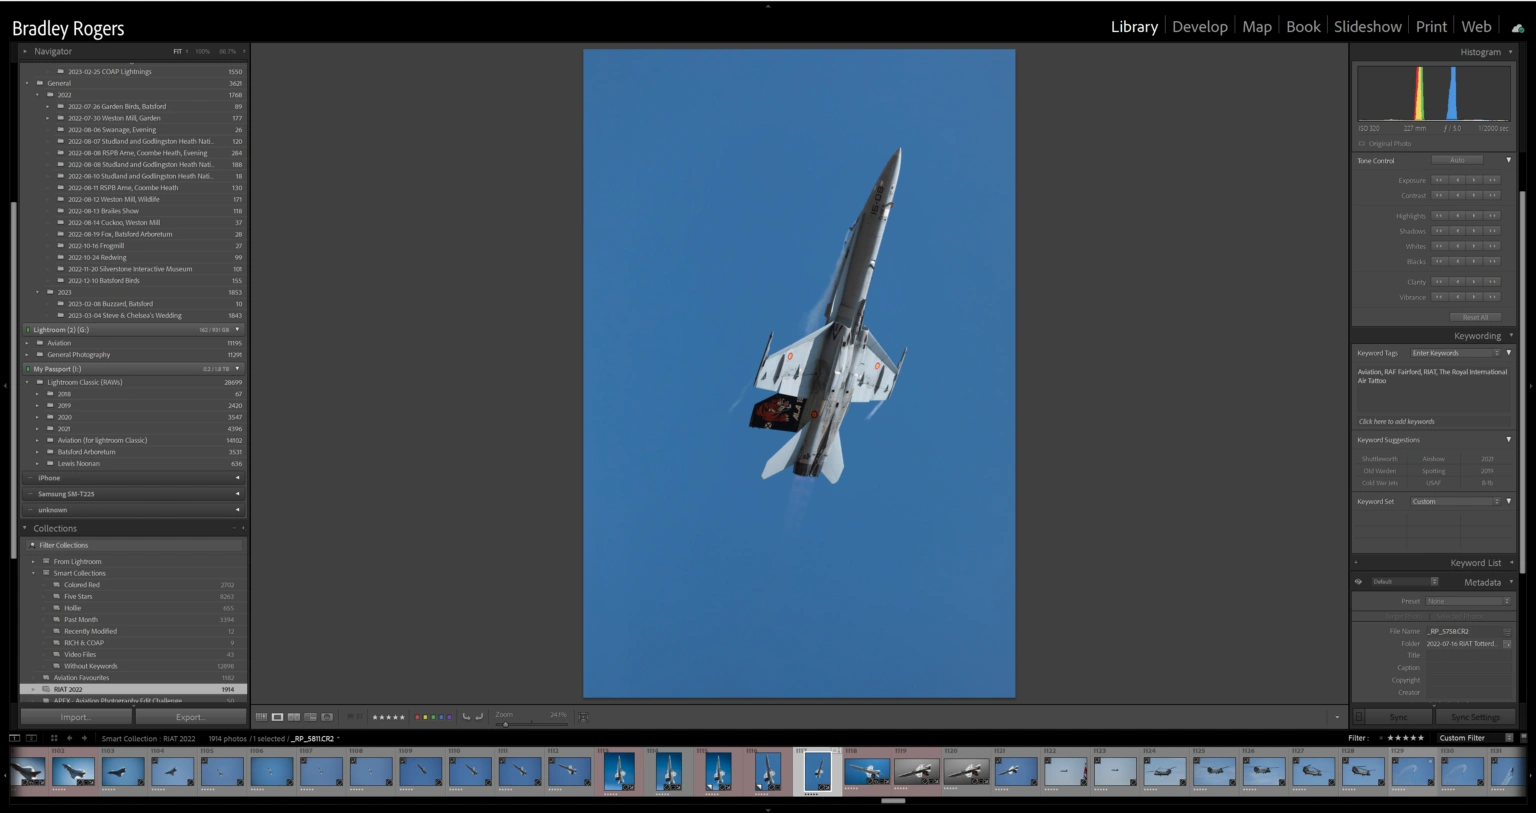
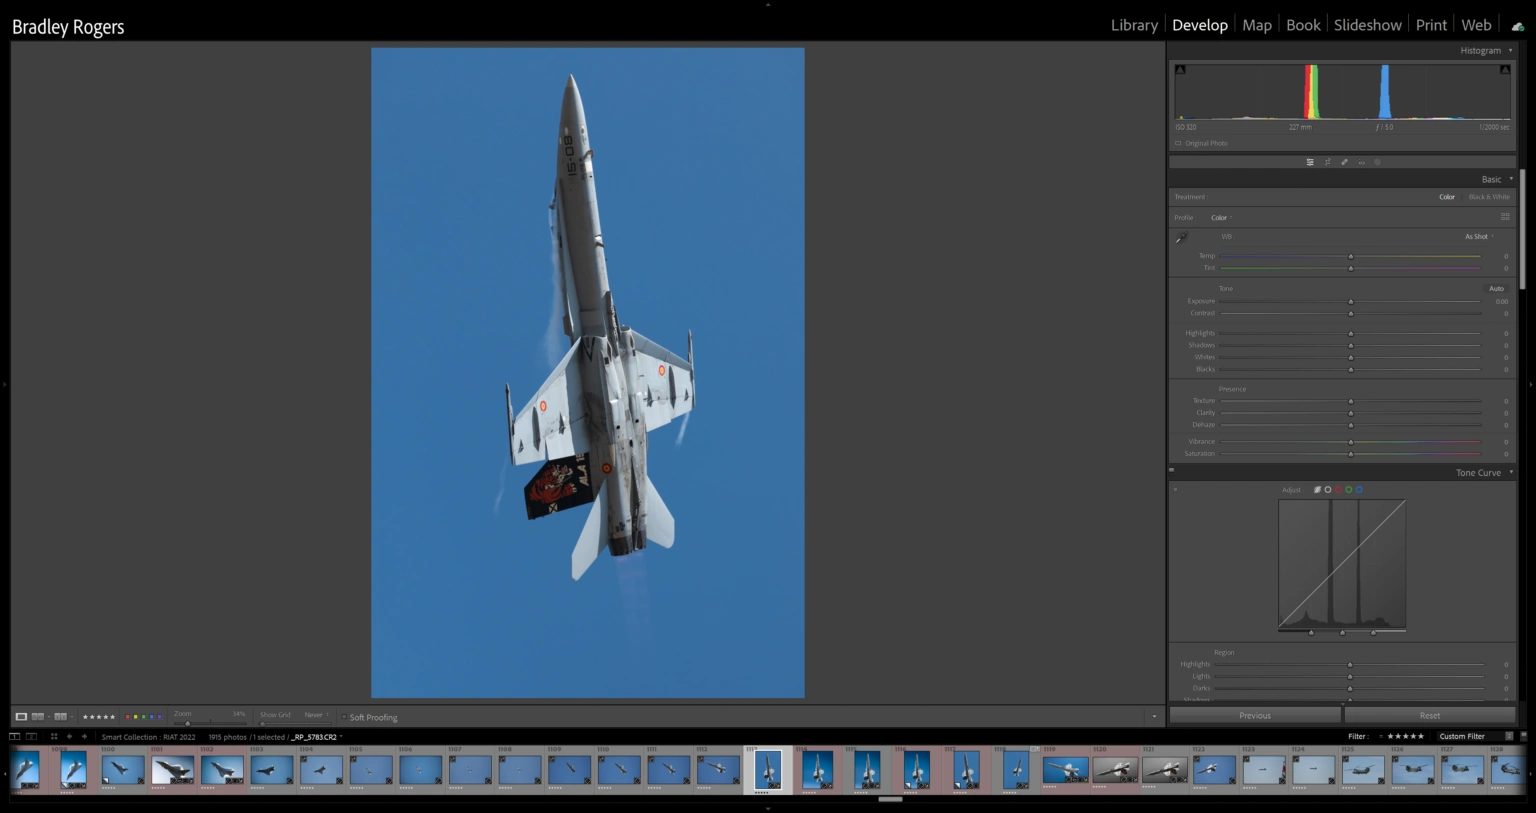
I could edit the image as shot, cropping to suit a more balanced composition. However, as you can see in the previews in the screen shot above, I’ve done that before! So why not try something else? Using the rotate arrows in the loupe view, I can flip the image through increments of 90°, in this example to portrait, nose up.
The lighting in this instance doesn’t lend itself to an obvious orientation. The uniform of the blue sky and light falling on the jet I could almost be air-to-air. Where as if the jet was heading landscape, but left to right through the frame, the underside would be vastly brighter than the topside of the jet. That would mean the sun would be somehow underneath it and wouldn’t look real.
However, it still leaves me with the dilemma of not being able to fit the image into a pleasing crop using Lightroom. The composition needs to be fixed, so lets sort that out now… Right click “Edit in” then “Photoshop”.

I will admit you could probably fit my photoshop knowledge on to the back of a postage stamp! The software is something I rarely use, except for where Lightroom comes up short. For example; tricky object removals, adding watermarks and cropping tricky shots like here.
Photoshop is outstanding, dove tailing perfectly with Lightroom. You open your image in Photoshop, quickly and easily straight from Lightroom, using the “right click” then “Edit in Photoshop” with all your Lightroom adjustments. So I usually make sure I’ve done my lens corrections prior to moving to editing in Photoshop, if wanting to correct the composition first, before any major processing. Once you’ve saved your Photoshop tweaks, the image will be sent back as a TIFF file to Lightroom, but flattened meaning the sliders are all reset.
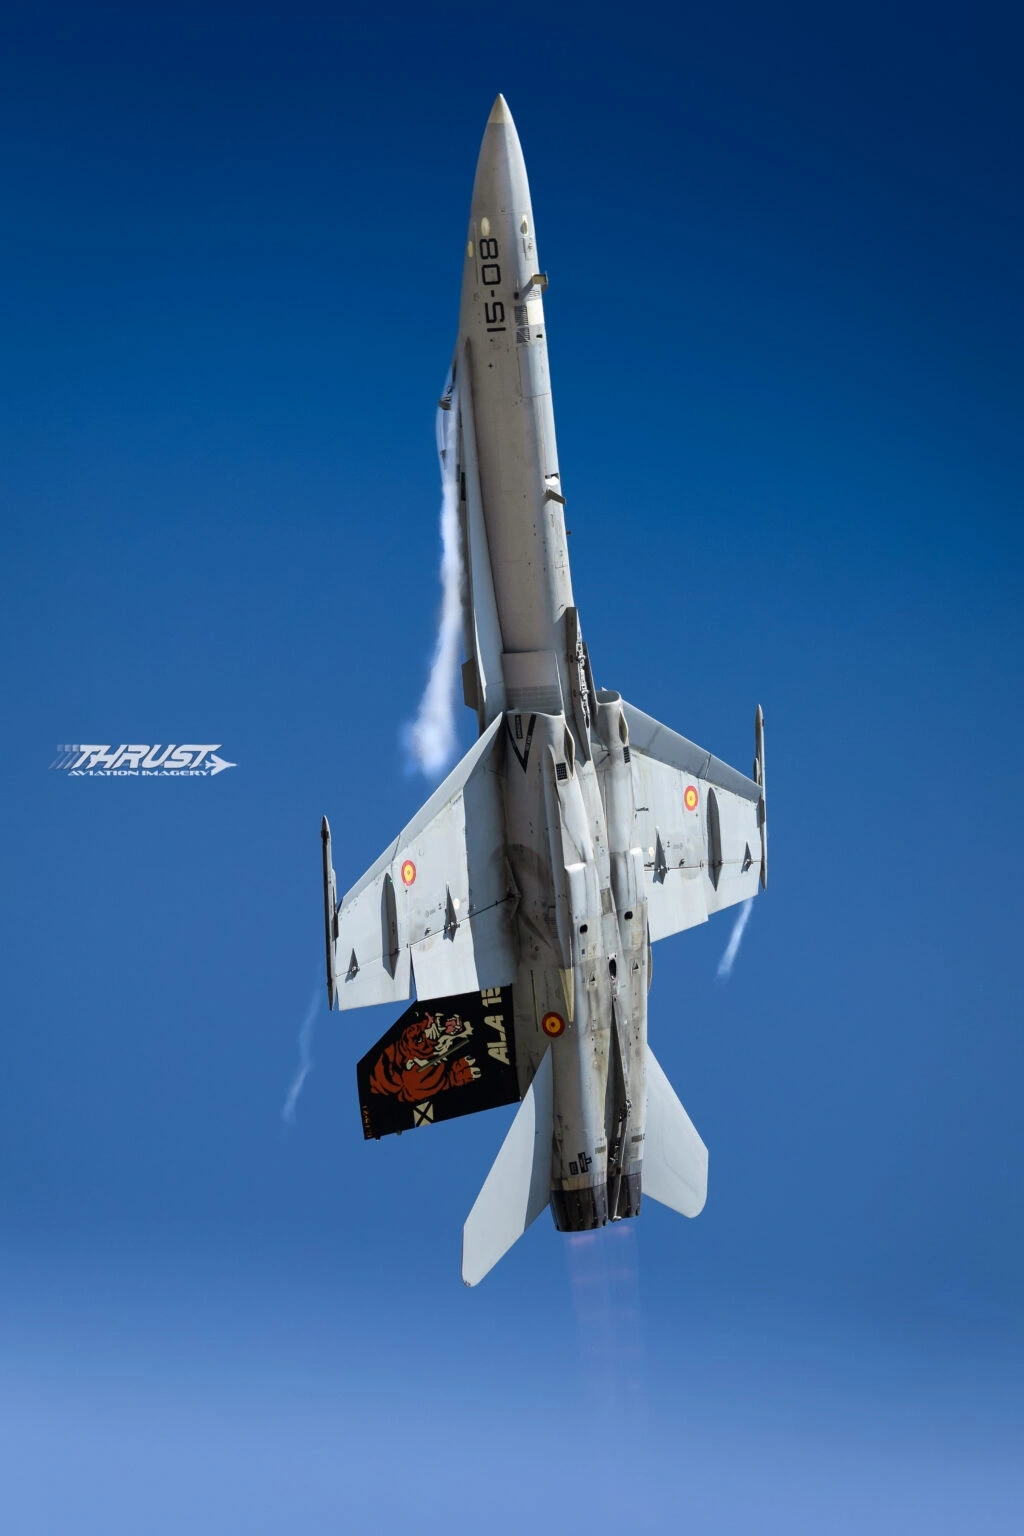
Grabbing the crop tool in photoshop, I can select the crop size in the top left and ignore the edges, which Lightroom will restrict. I placed the subject this time where I want it to be, even twisting the image. For a cresting the loop feel.
“But wait!” I hear you cry. “There a massive white triangle, you’ve lost the sky!” Don’t fear. The Photoshop wizards are all over it. All you need to do is tick the “Content Aware” box along the top, and where there’s a obvious sky like here, the missing part is magically filled in.
MAGIC! Now the composition is fixed and photoshop has worked it magic. The next step is simple, click “file” then ” save” and wait for the image to be thrown back to Lightroom as a flattened TIFF.
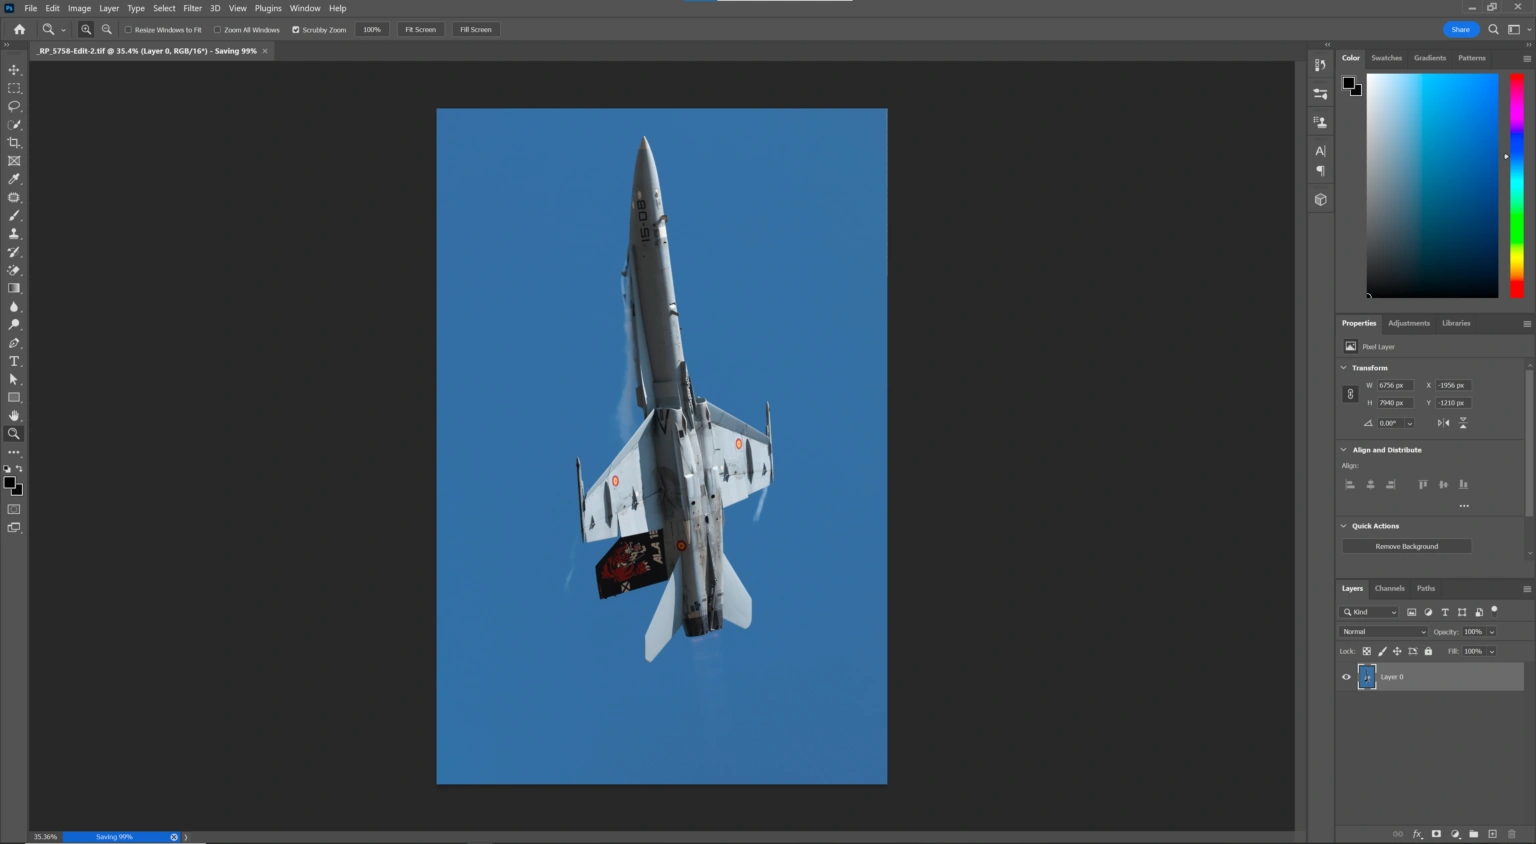
Now it’s back in Lightroom I can attack it by treating it as an out of camera shot. Taking the image from this…

And after my editing process, aiming for an Air-to-air feel. To this…
I don’t always have to use photoshop, Lightroom can do the job if the image fits where I’m taking the edit. Here are few other examples of using twist and rotate method to create a more interesting shot.
Aeronautica Militare C-27J Spartan at The Royal International Air Tattoo 2022 using just Lightroom Classic.
Before:
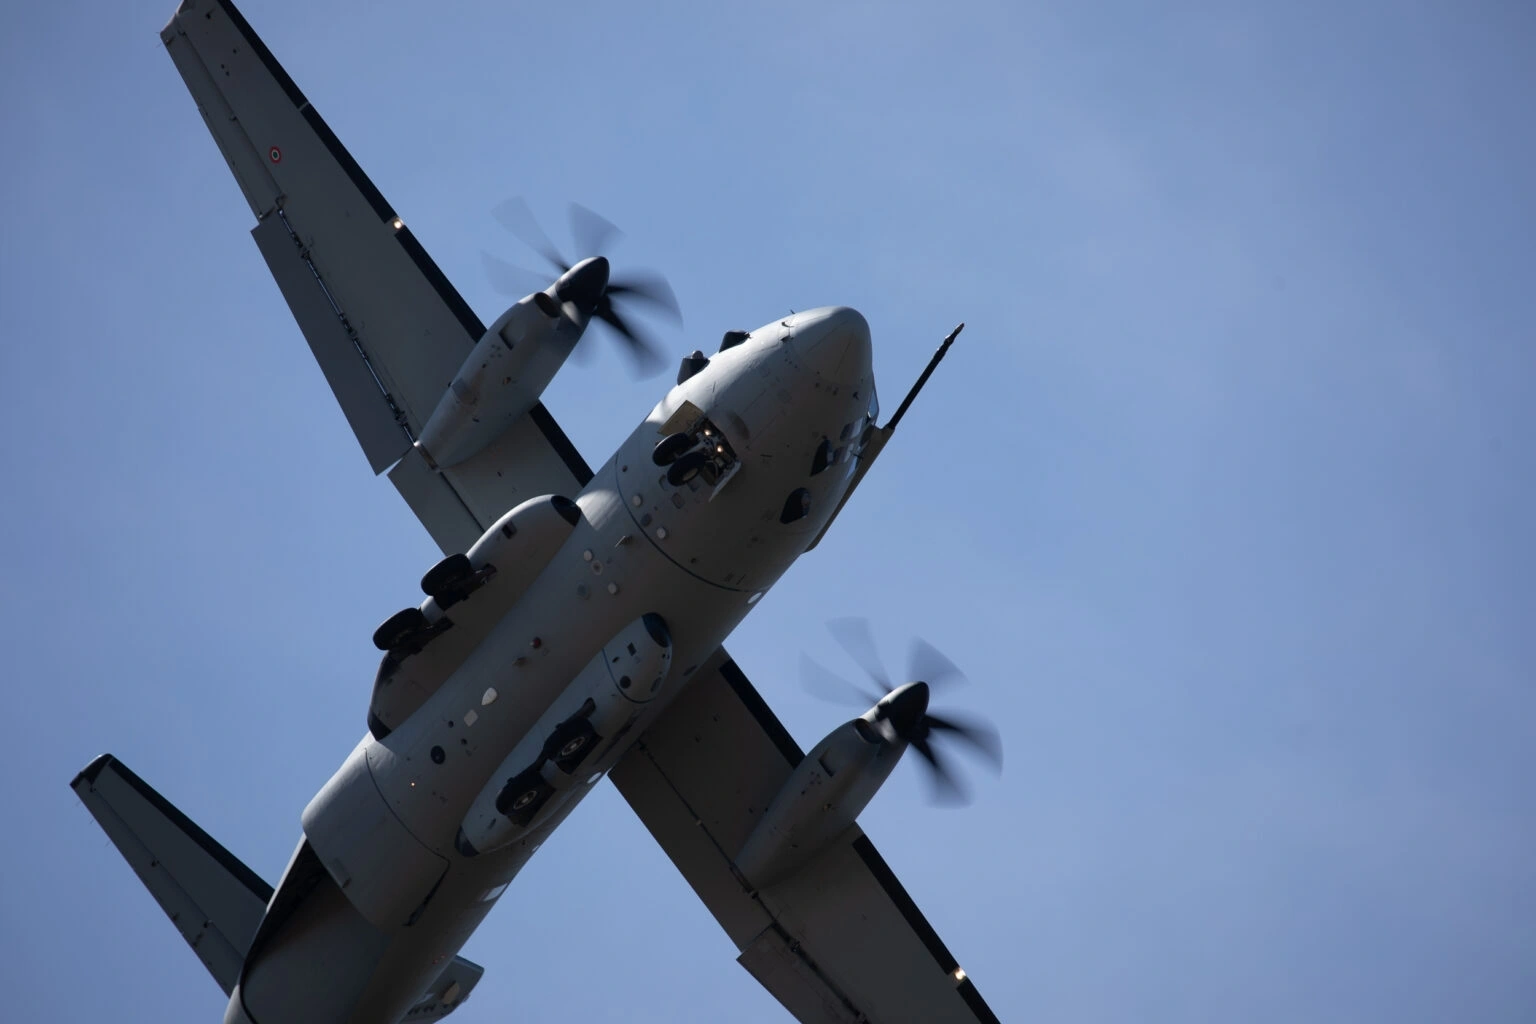
After:
Aeronautica Militare EF-2000 Eurofighter Typhoon The Royal International Air Tattoo 2022 using both Lightroom Classic and Photoshop, following the work flow as the Hornet. However in this case I used photoshop at the end of my edit, after initially using a different crop in Lightroom.
Before:

After:

Did you know our blogs are written exclusively by our members? We'd love for you to come and experience what COAP Online is all about!
Not yet a member?
Enjoy a free 30-day trial!
COAP Online membership brings 100s of aviation photographers from around the world together in a friendly, helpful and inspirational community. You'll enjoy monthly challenges, competitions, livestreams, blogs, exclusive discounts, meet-ups and more!
Get a free tutorial to your inbox every week!
Subscribe to our mailing list to receive a fantastic aviation photography tutorial to your inbox every Tuesday!
We hate spam as much as you. We will never sell your information, for any reason.