Vintage Edits
Jul 01, 2024
By Matt Holmes
I have never done anything like this before, so hopefully it will all work & make sense! I have had a couple of people ask about my recent ‘vintage’ style edits & it was suggested I write one of these blogs, so here we go…
I have tried old fashioned/vintage style edits before, but never to this current extent. This has come about from two recent trips to YAM, the Yorkshire Air Museum at Elvington. The first was the COAP shoot in March & the second in May, for the ‘We’ll Meet Again’ weekend, both with reenactors present.
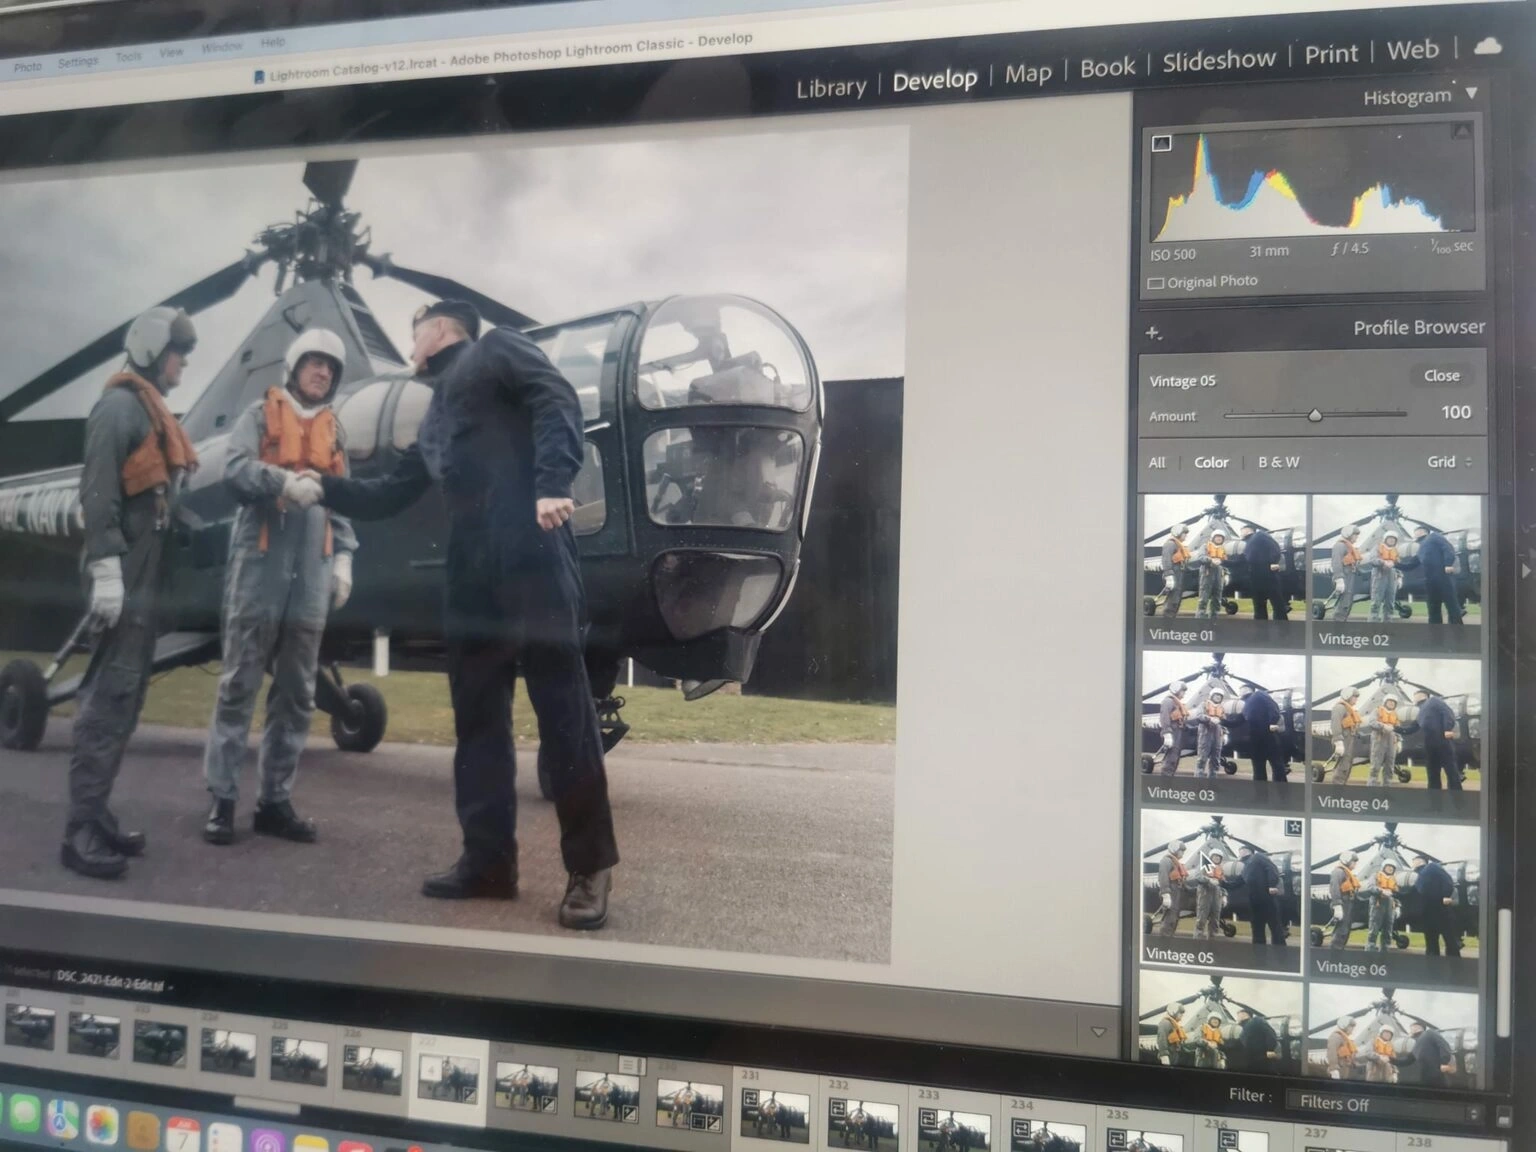
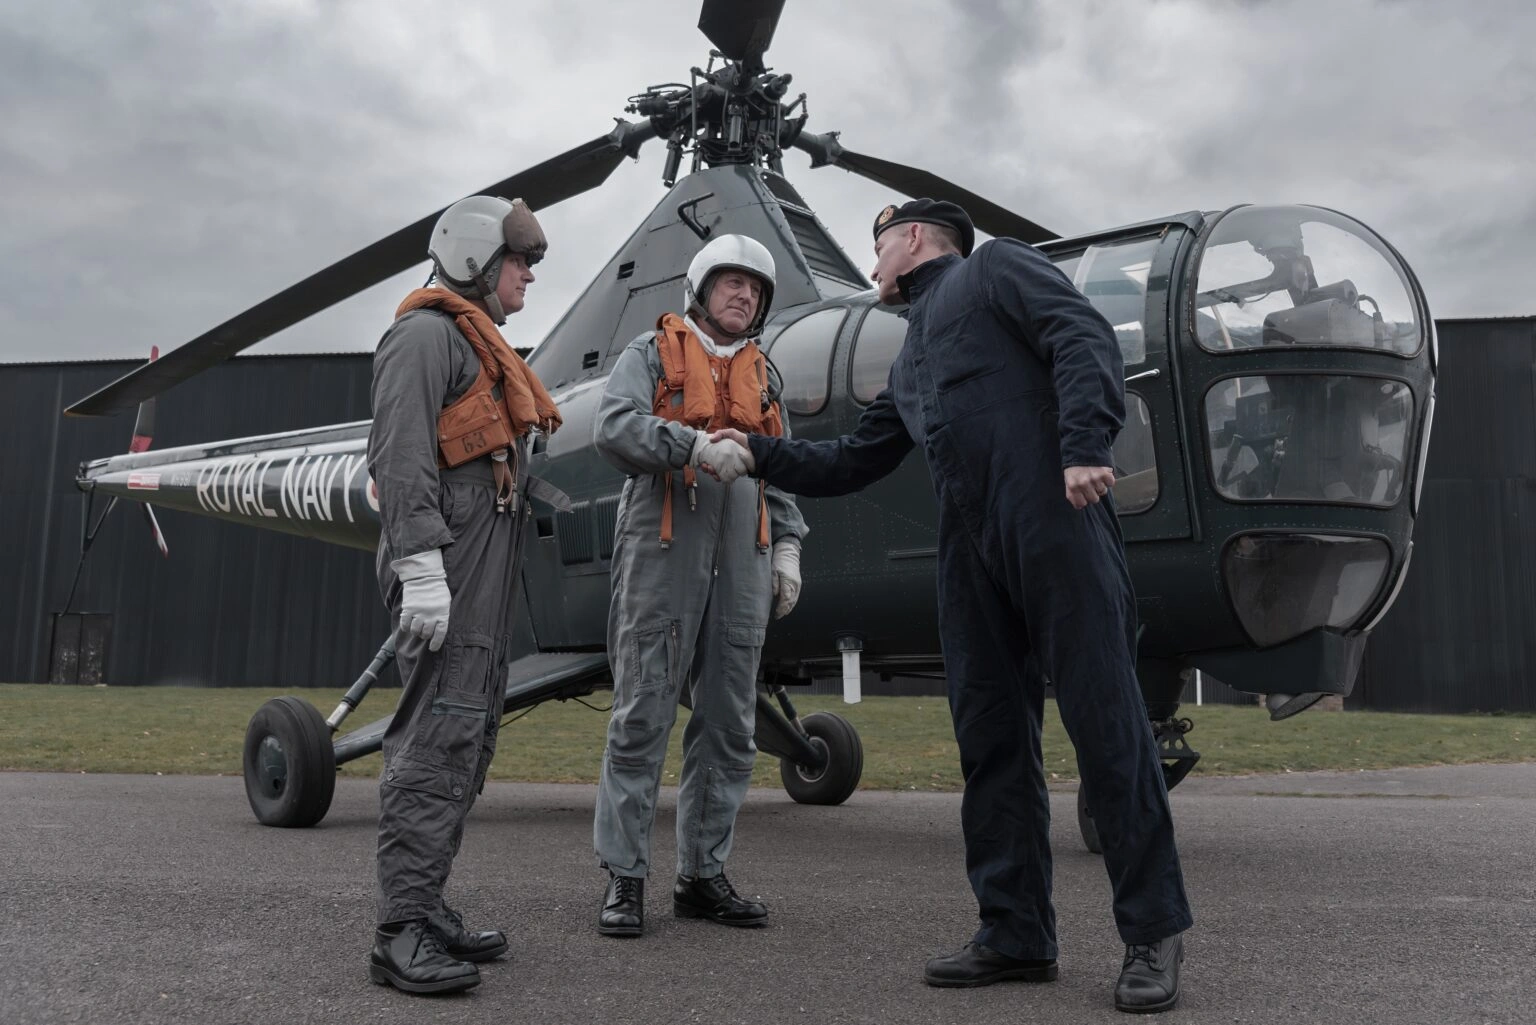
Firstly the COAP shoot in March, starting with the Dragonfly helicopter. When it came to editing the first series of set-ups with the reenactors, my ‘real’ images looked just like that, some guys stood with an aircraft at a museum, so I wanted to add something to the image. Shooting in RAW & editing in Lightroom is the norm I guess for most people & I am no different here. I knew Lightroom had some vintage presets in the colour treatment profiles above the white balance settings. So after doing all my usual LR adjustments, I looked at what presets were on offer. I settled on vintage number 5 & used this for all my Dragonfly edits & the Meteor shots, which were made afterwards. I think I might have dropped some saturation levels too, but all trial & error until I was happy with the tone. I guess these tones can be achieved through the editing process manually, but the presets save time & if the look you want is there, then take advantage I guess. Excuse the phone images, but I will add screenshots of the editing software, as well as finished pictures –

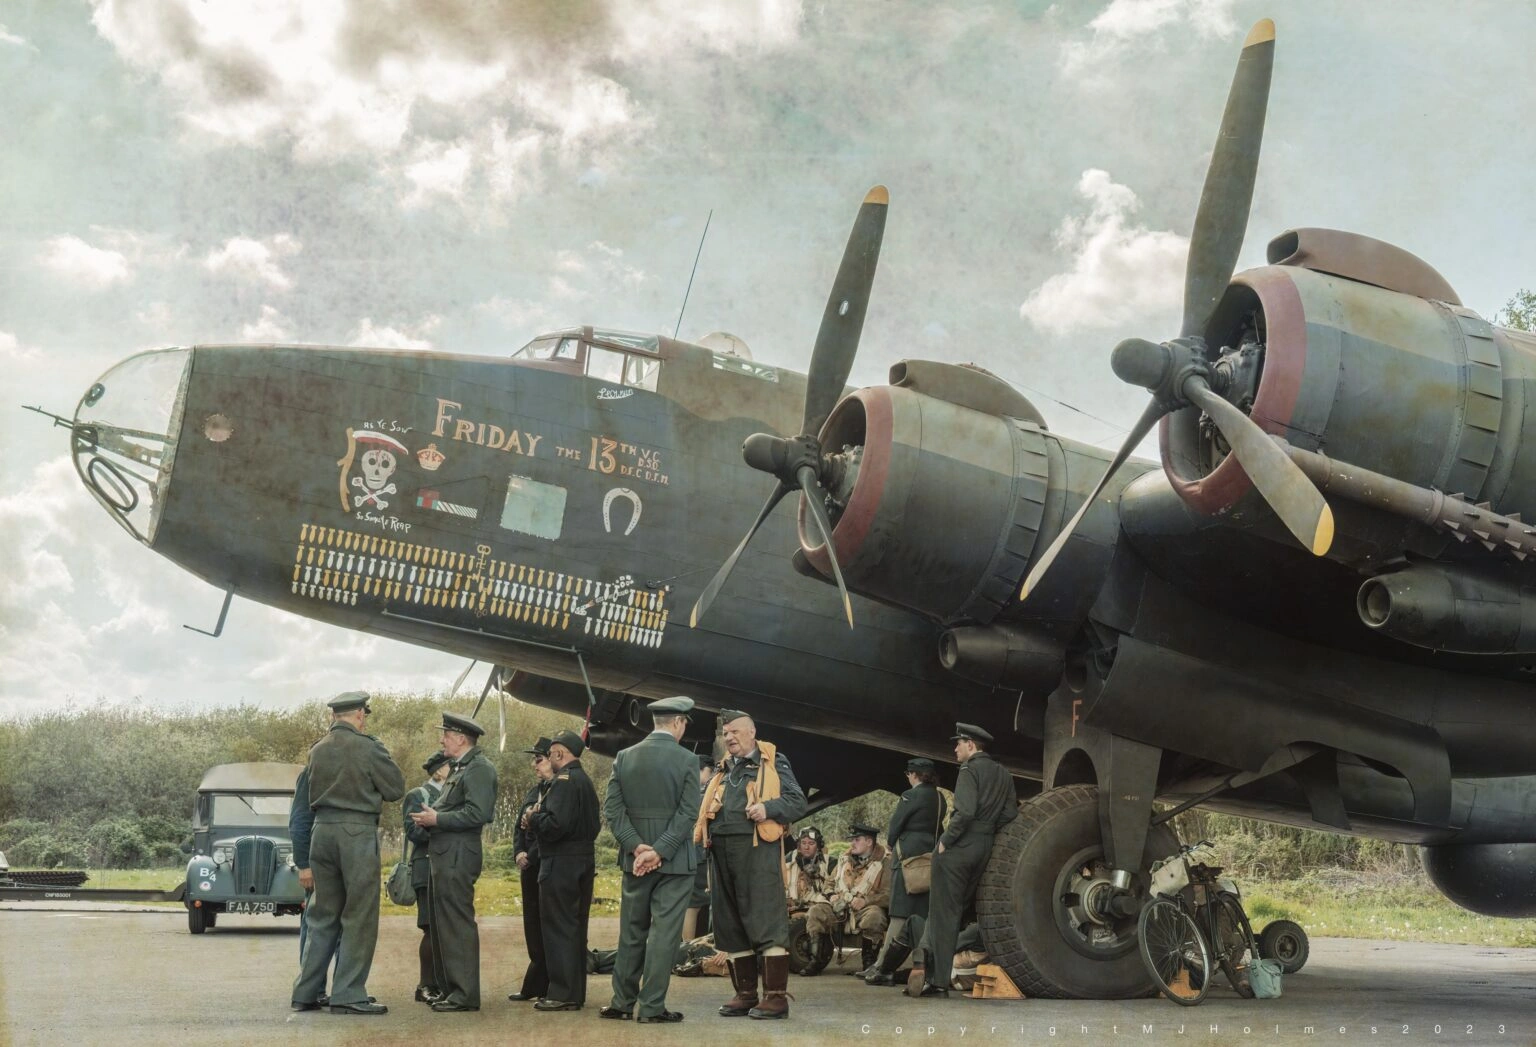
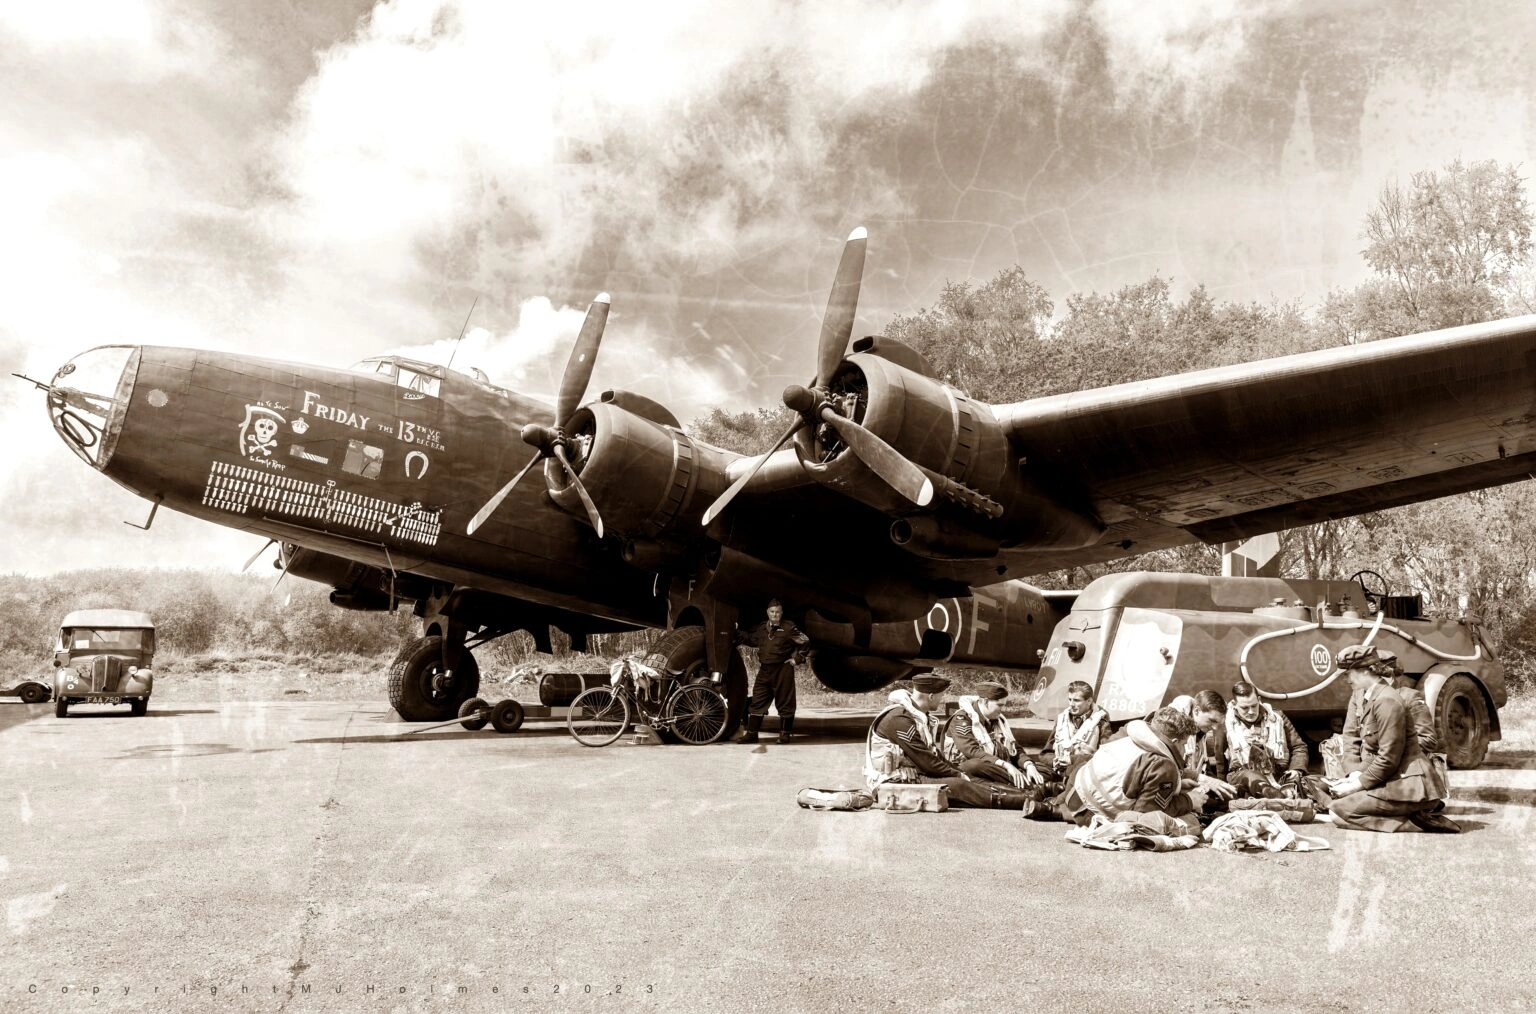
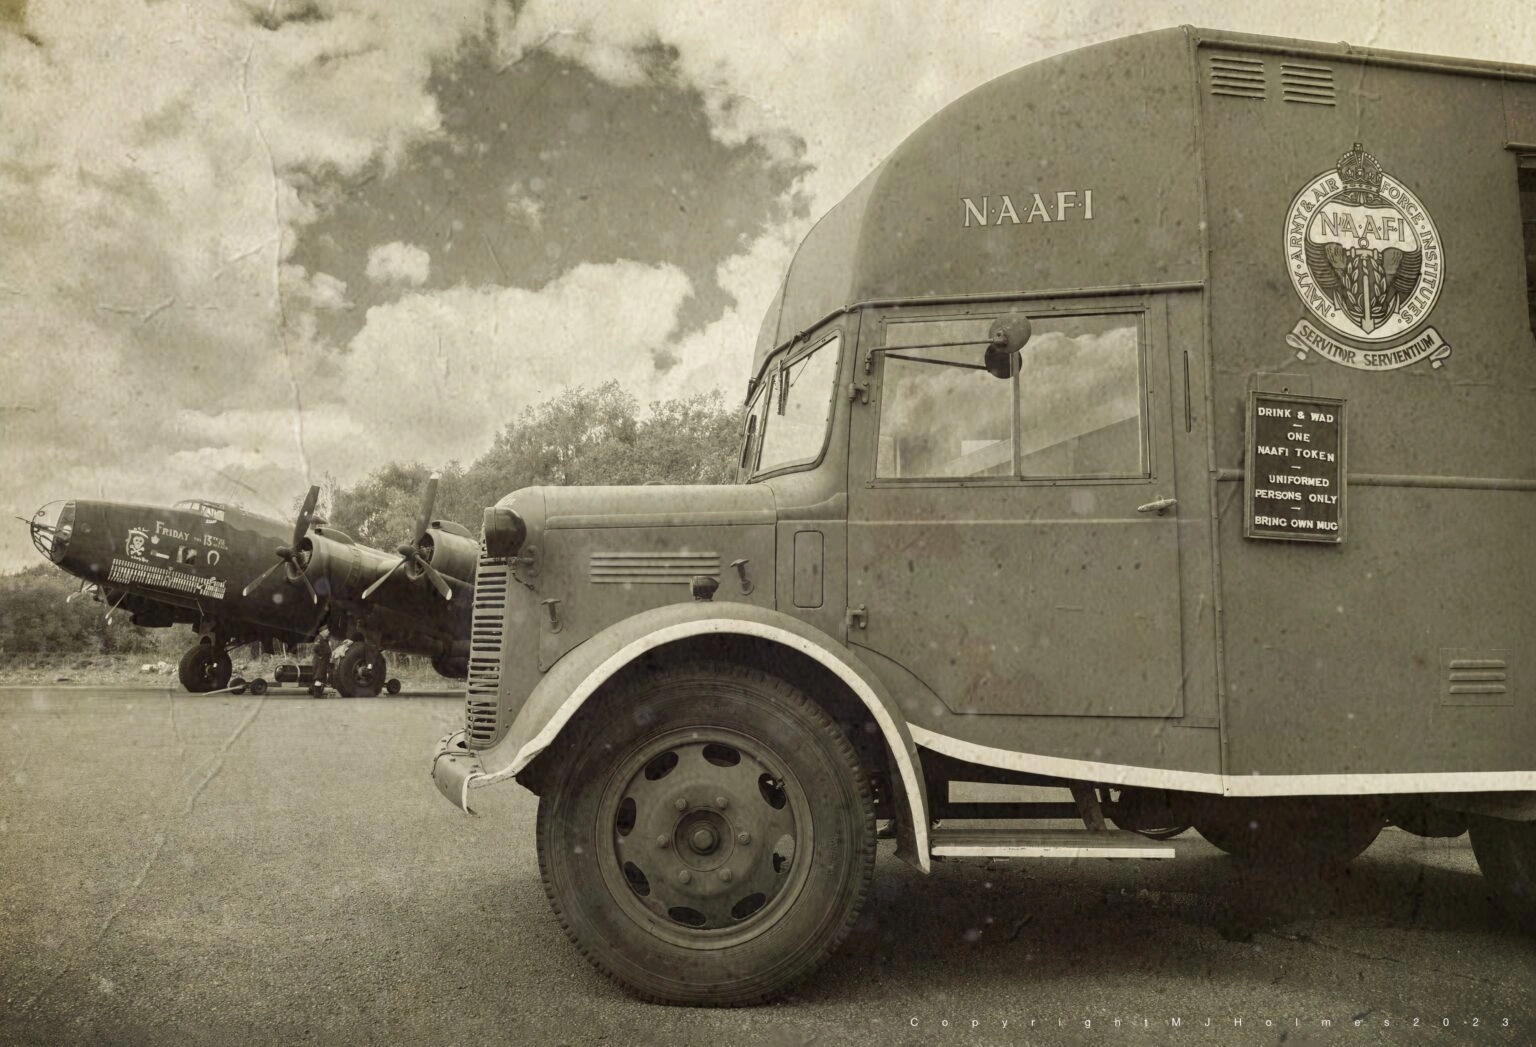
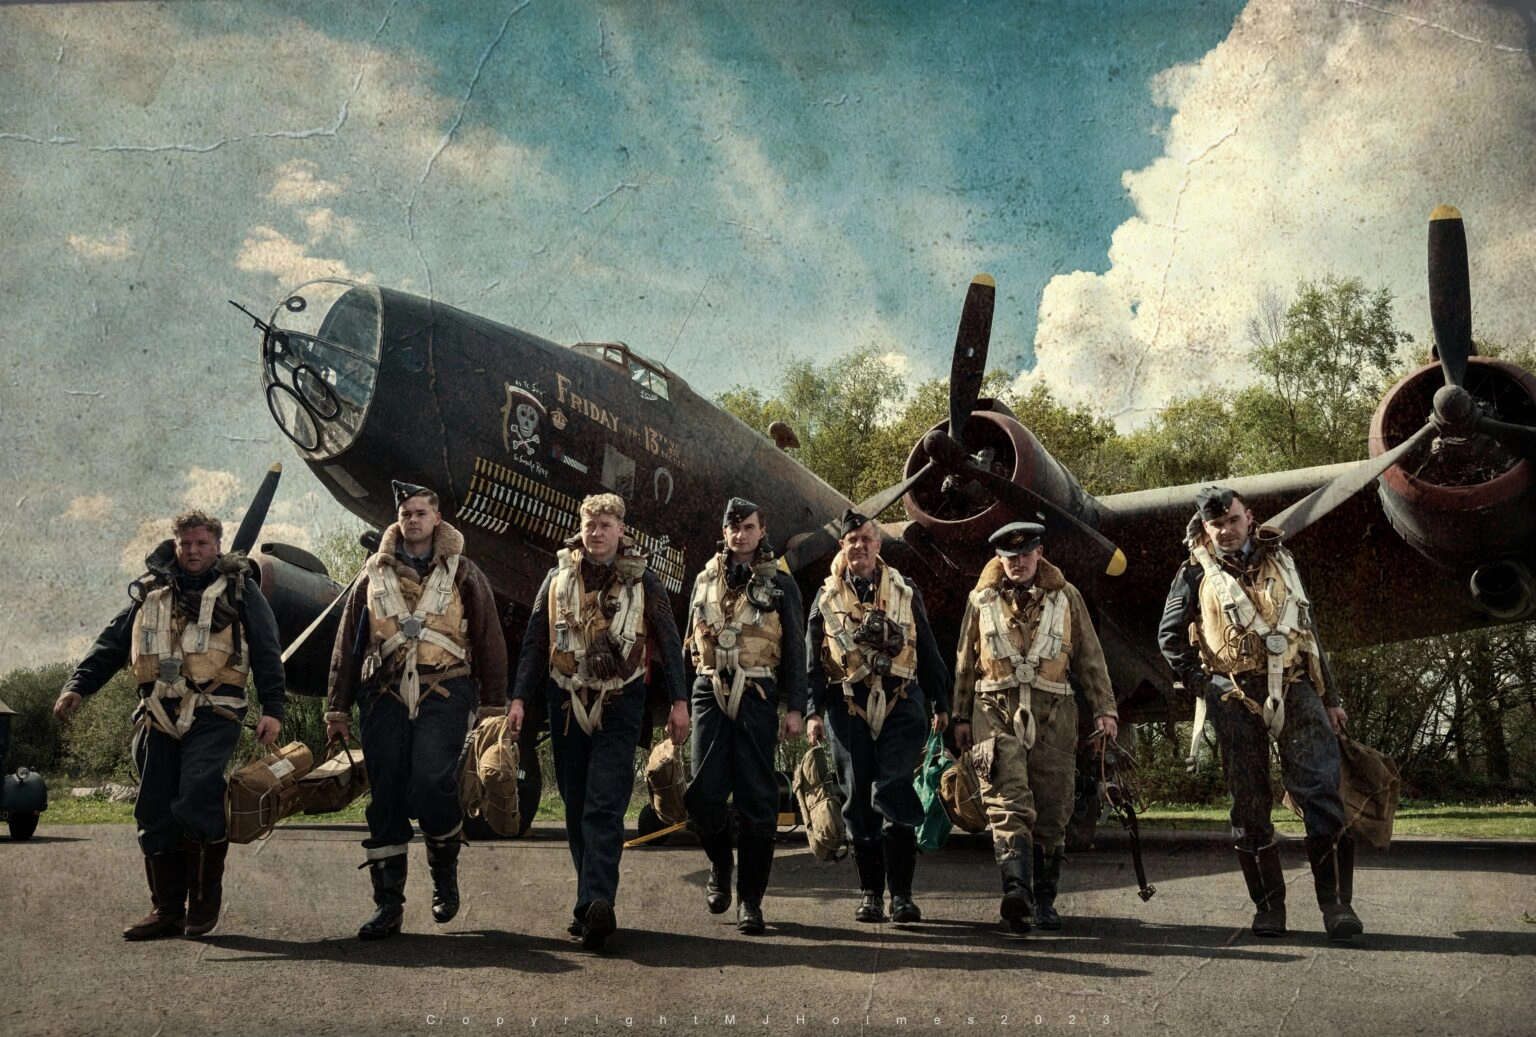
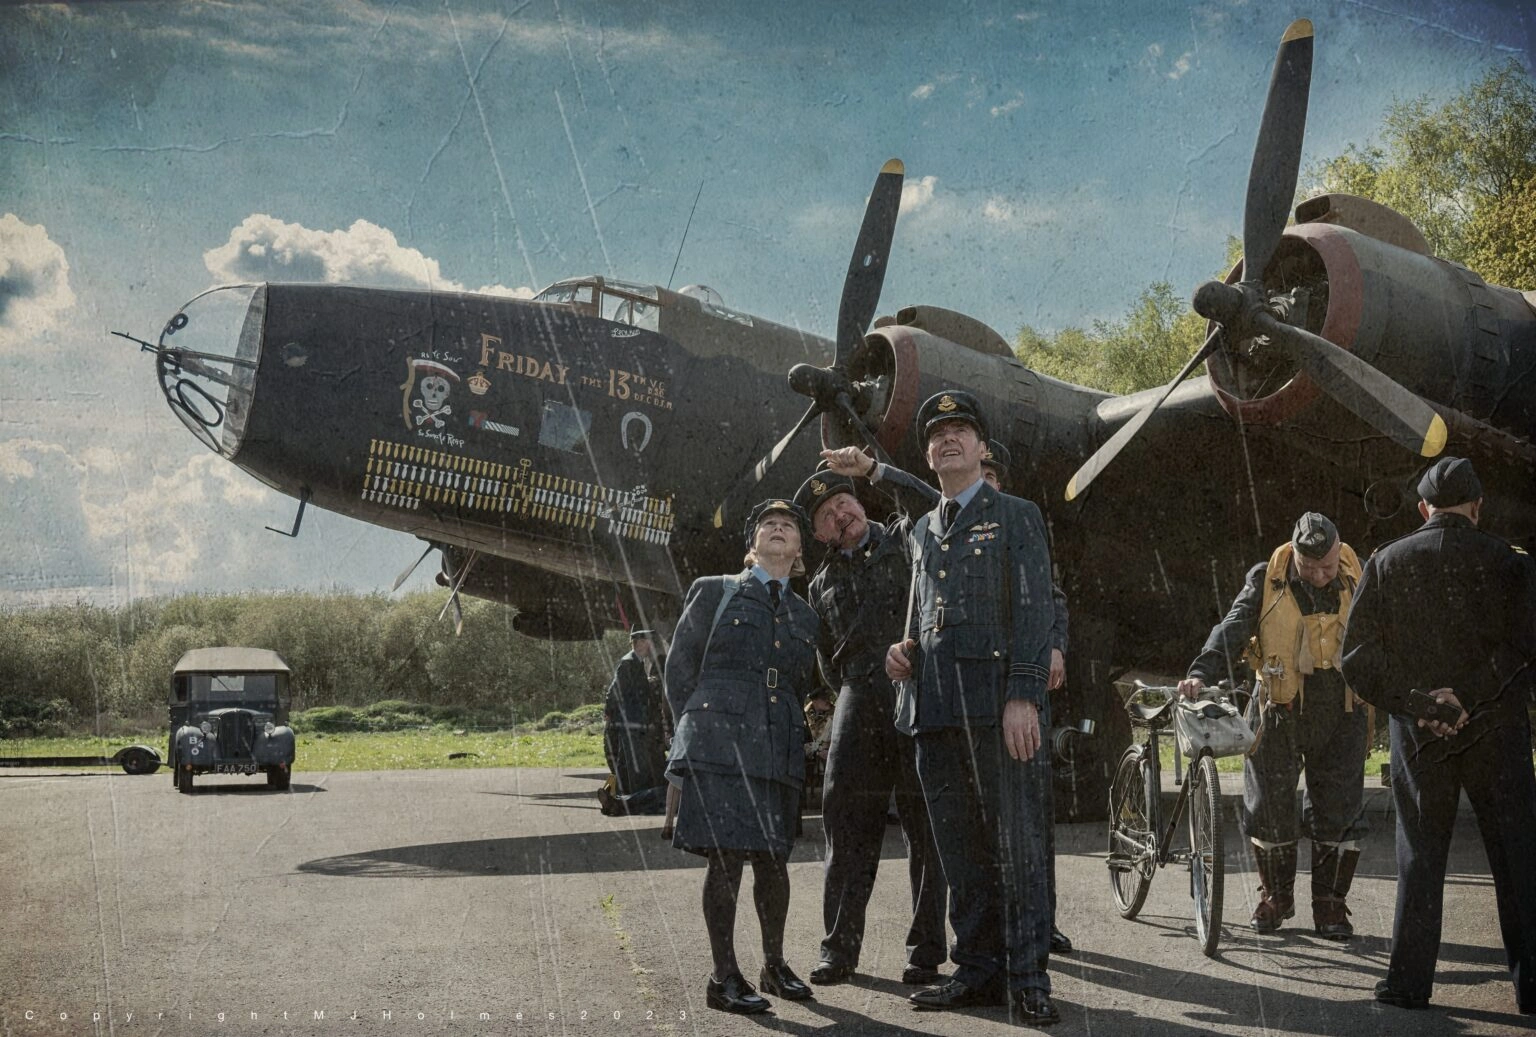
So far pretty straightforward. But it was the second visit in May that brought out the bolder edits if you like. Unlike the COAP shoot, this day was a public day, with no wires around the Halifax bomber, Friday the 13th. Meaning people could wander around & under the aircraft, requiring patience to pick off the shots wanted. With reenactors on site all day, there was plenty of time for this. Again I started editing, did a first ‘real’ edit, then decided to look at making it look more ‘vintage’. This is where a different editing style took over.
Many years ago, before I shot in RAW & before I had Lightroom etc, I used a free piece of editing software called Photoscape. This only supported JPEG, but was pretty good in terms of editing features. I used this for a few years, before switching to RAW & adobe editing products. Then a few years ago, I got a new MacBook & found that a new version of Photoscape had been released, Photoscape X. This has two versions, one free & within that, a PRO version, which costs £39.99 to upgrade to. (plus I think it supports RAW now too). This PRO version has many extra features to the free version. Let’s stick with the free version & how I use it.
I do my usual RAW editing in Lightroom, cropping, white balance, light, colour etc. I occasionally drop into Photoshop for Content aware removals & expanding crops. Saving back to LR or continuing in LR , I sharpen in Topaz Sharpen AI. This can work wonders with some images, but also play havoc with lettering on aircraft, so use carefully! This program also reduces noise, so I use it for both.
From there save to LR & then export from there. This is where I have been using Photoscape X, to polish up my saved JPEG’s. Now I know this won’t be for everyone, but it is now part of my work flow if you like. I find some slight tweaks to my JPEG’s, white balance, contrast, slight sharpen, can polish up & make the JPEG pop a little more. Again this is what works for me. See next picture for the Photoscape X editing menu.
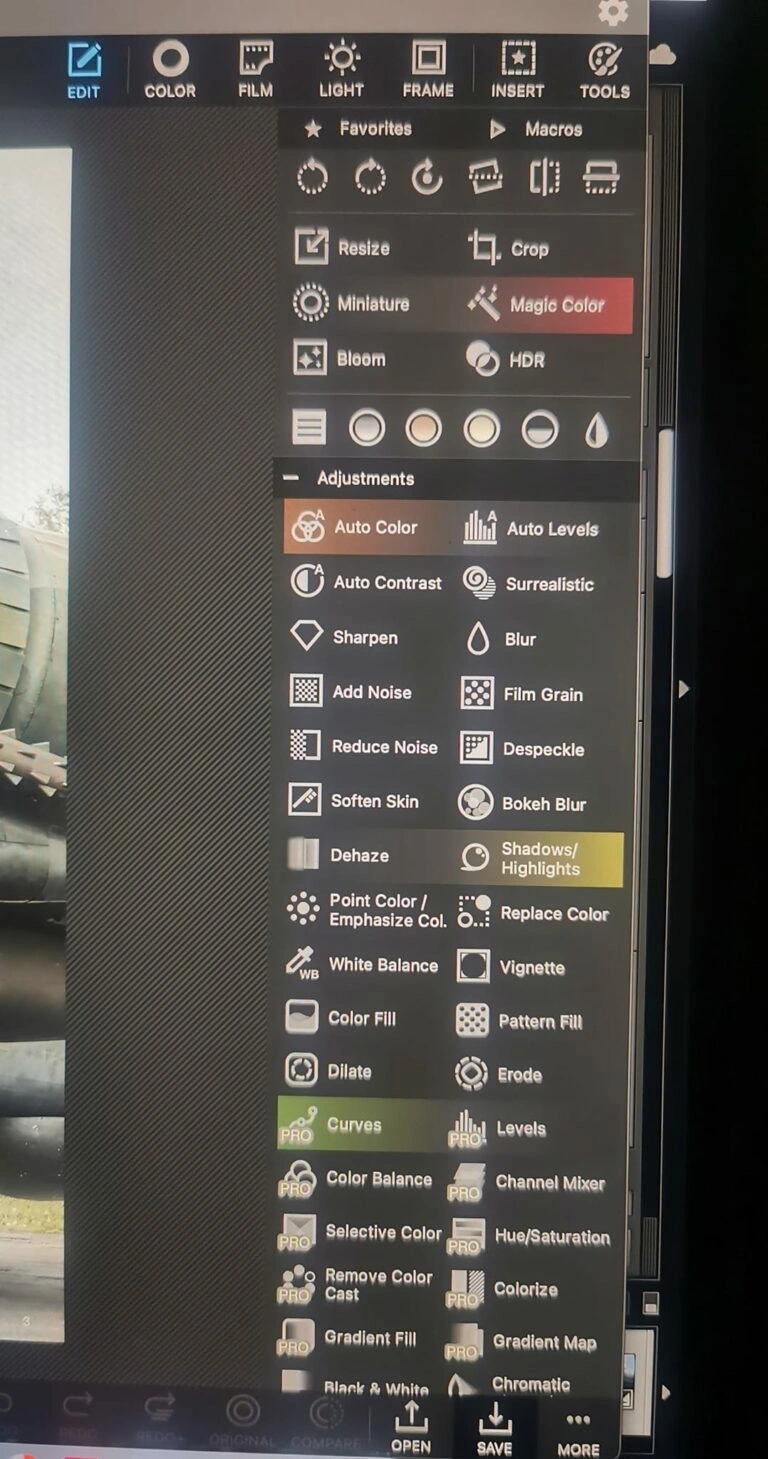
Now I wouldn’t normally do any big editing to JPEGs, that is what the RAW files & Lightroom are for, but in the case of these ‘vintage’ edits, this is where I have been doing them & they have been holding there own! I knew there were presets here, but I had never really looked at the full extent of them. There are many options under the FILM option at the top of the menu. With 8 different sub menus, all with multiple options of styles. Here are a few more screenshots of these –
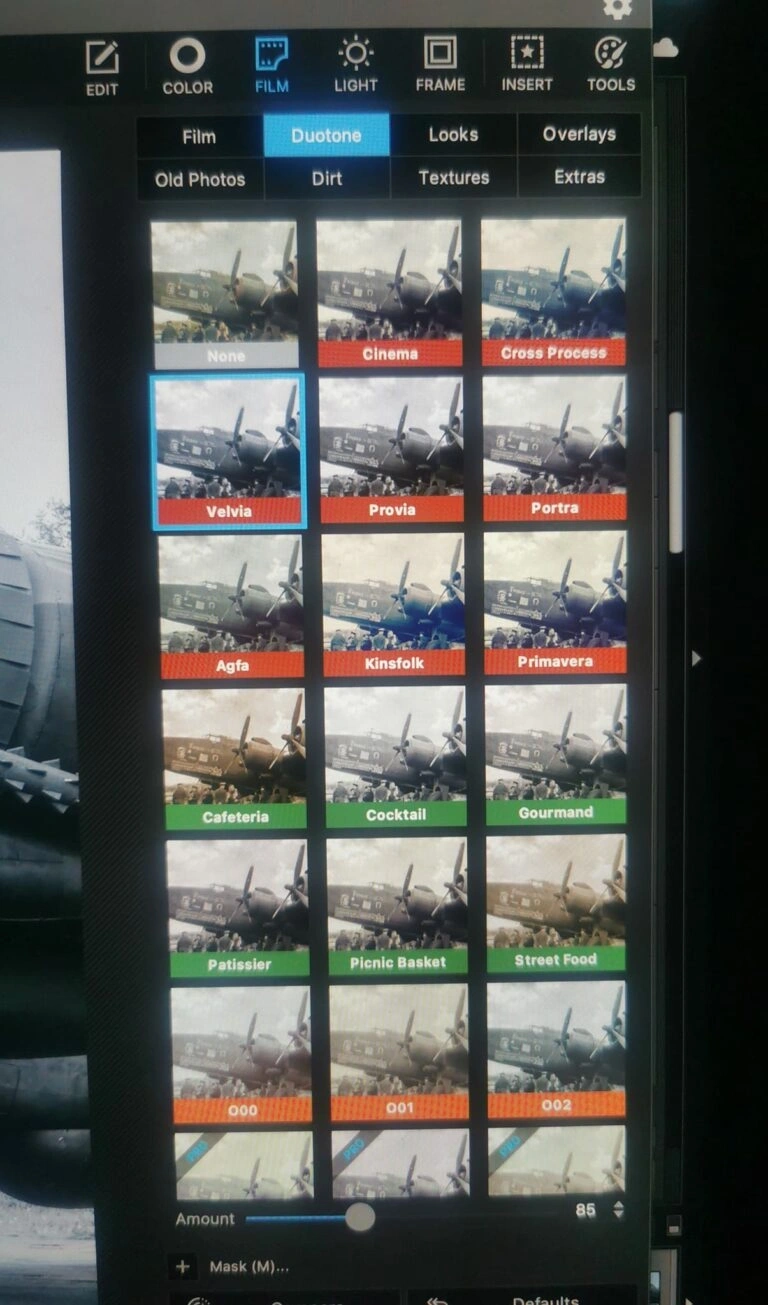
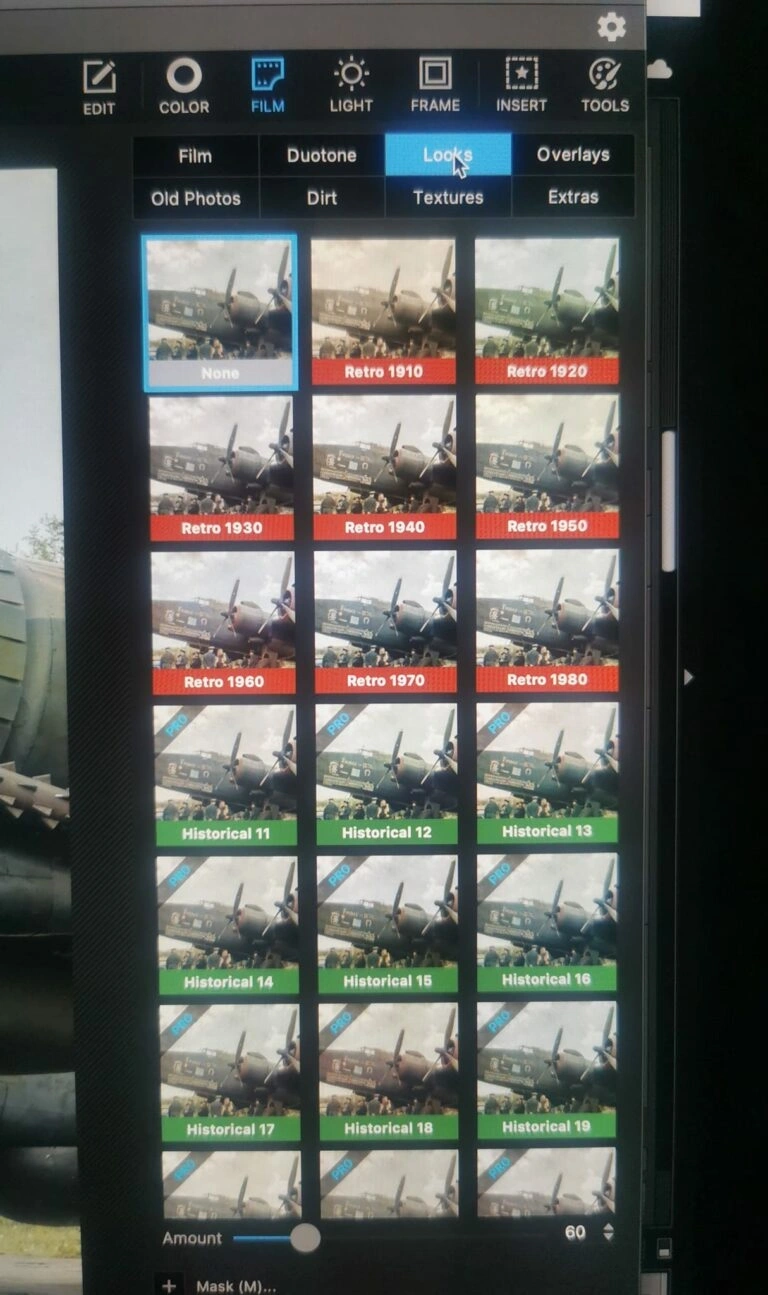
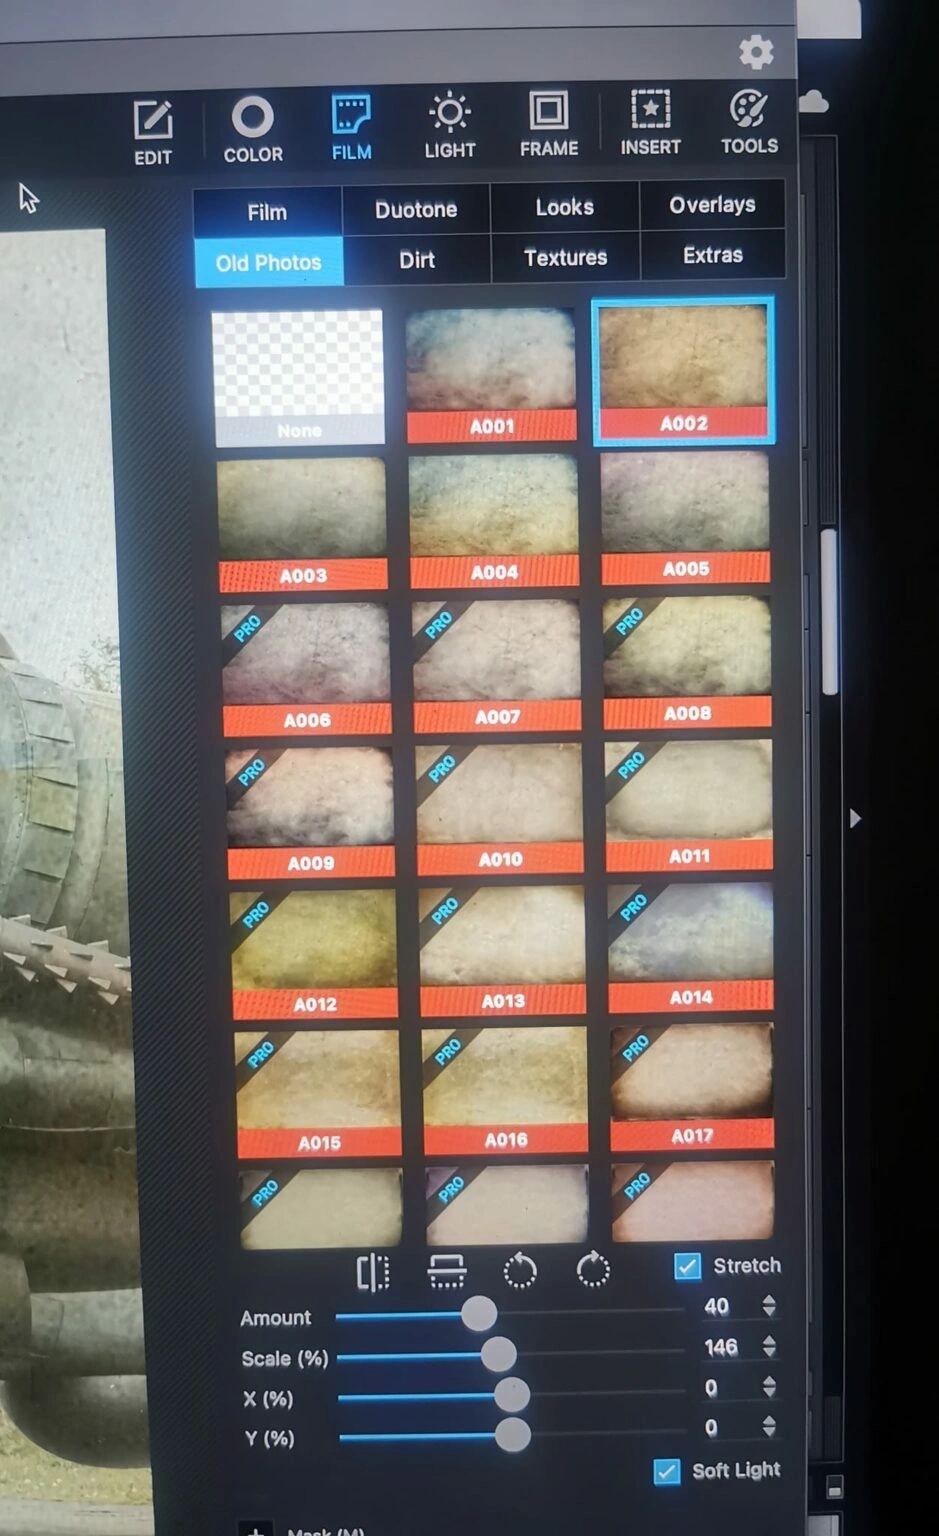
There are many options & styles to choose from & they can all be combined. I have gone down the trial & error route & just gone with what I think looks right for each image. Some I have done several different edits of the same image. These presets are all fully adjustable, in tone, opacity, strength, with masking & there is the option to add scratches, dust & texture. Again these are all adjustable, scratches etc can be rotated, expanded etc, so you can fit them into the image as you see fit! The colours of these additions can be altered also, between black, white, grey etc & the strength again. Some of my shots from certain angles had background clutter, including more modern things, that wouldn’t be in a picture from theses periods. I could have just shot from one side, but we like to shoot all angles don’t we? I tried cloning various objects out in Photoshop earlier in the process, with varying degrees of success. But I found in couple of my edits, that a messy clone job, could be disguised by scratches or dust & as you can mask, you can add these things where you want & so cover up or hide any imperfect cloning! Obviously this wouldn’t work in a ‘real’ image, but can do in these style edits! The image below from the left side of the Halifax, has this cover up work in it. The Nimrod & Mirages were visible in the background & I couldn’t remove them cleanly, so added some extra ‘dust’ ‘texture’ to disguise this! Once again using these presets is a lot easier & quicker than doing it all with sliders in LR & again I know this won’t suit everyone & I’m not suggesting everyone should do this, but it works for me & it’s all about finding what works for you. Here are some of my edits, most of which have been shared on Inspire –

If anyone is interested in looking, I have been adding some more of these edits to a friends Aviation stock image library at V1images, here is a link –
https://www.v1images.com/registration/lv907/
If you got this far, thank you for reading, hopefully it all makes sense & gives some people some extra options with their editing.
Thanks again, Matt.
Did you know our blogs are written exclusively by our members? We'd love for you to come and experience what COAP Online is all about!
Not yet a member?
Enjoy a free 30-day trial!
COAP Online membership brings 100s of aviation photographers from around the world together in a friendly, helpful and inspirational community. You'll enjoy monthly challenges, competitions, livestreams, blogs, exclusive discounts, meet-ups and more!
Get a free tutorial to your inbox every week!
Subscribe to our mailing list to receive a fantastic aviation photography tutorial to your inbox every Tuesday!
We hate spam as much as you. We will never sell your information, for any reason.