X-TREME Editing
Jul 01, 2024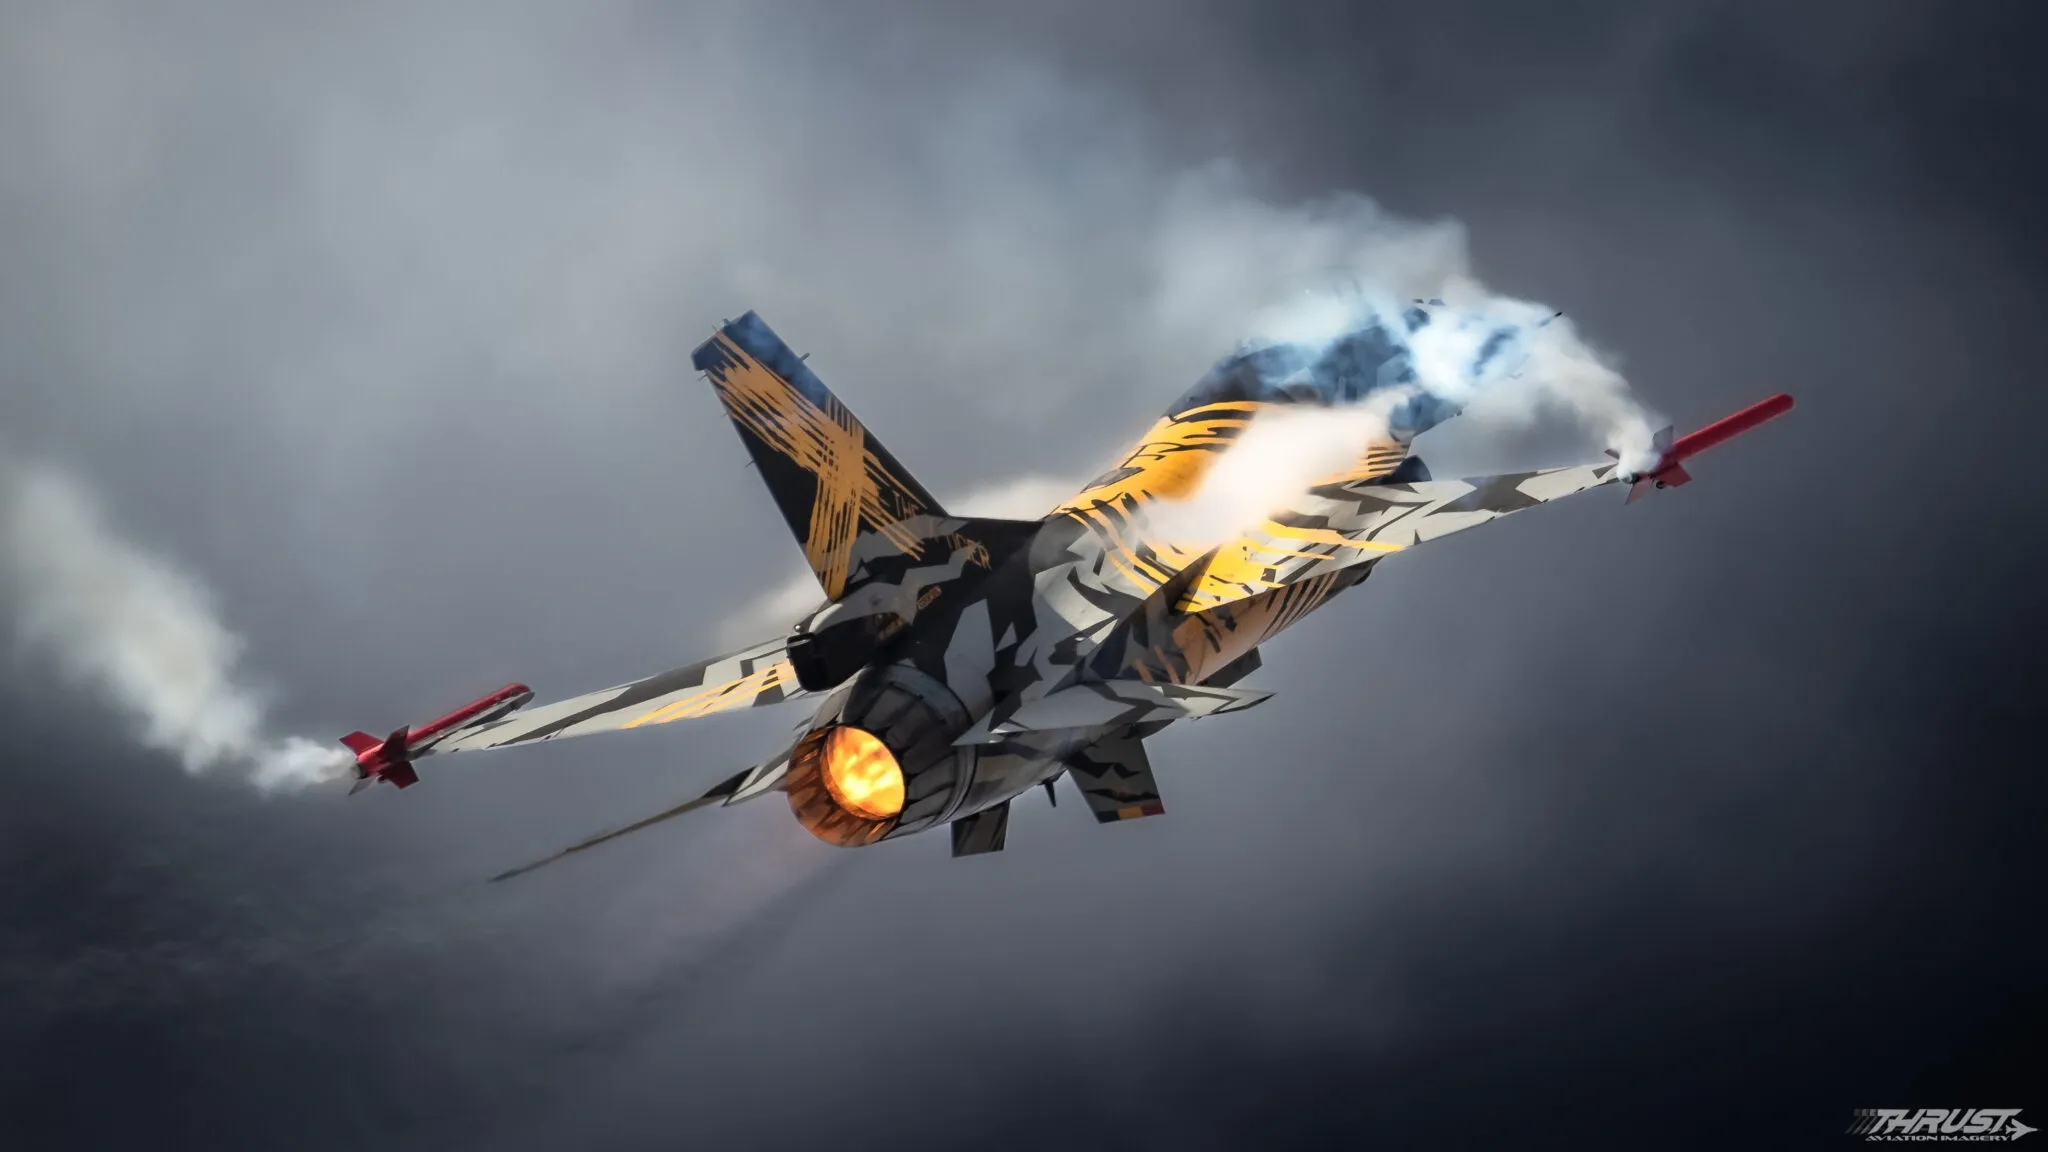
By Bradley Rogers
I often get compliments on my creative edits. So I thought it would be an ideal use of the Member Blogs to share with you my edit process on the X-tiger shot from RIAT.
My edits often start without me knowing the final destination of the finished edit. I like to have play around sometimes with Presets or sometimes just seeing, with my gained knowledge of Lightroom, what can be achieved creatively. In this case the final result is quite extreme from the original, out of camera shot. As you can see (above) in this instance the speed it was travelling and my lack of speed in panning, resulted the jet being rather low in the frame. So first it was all about correcting the composition.
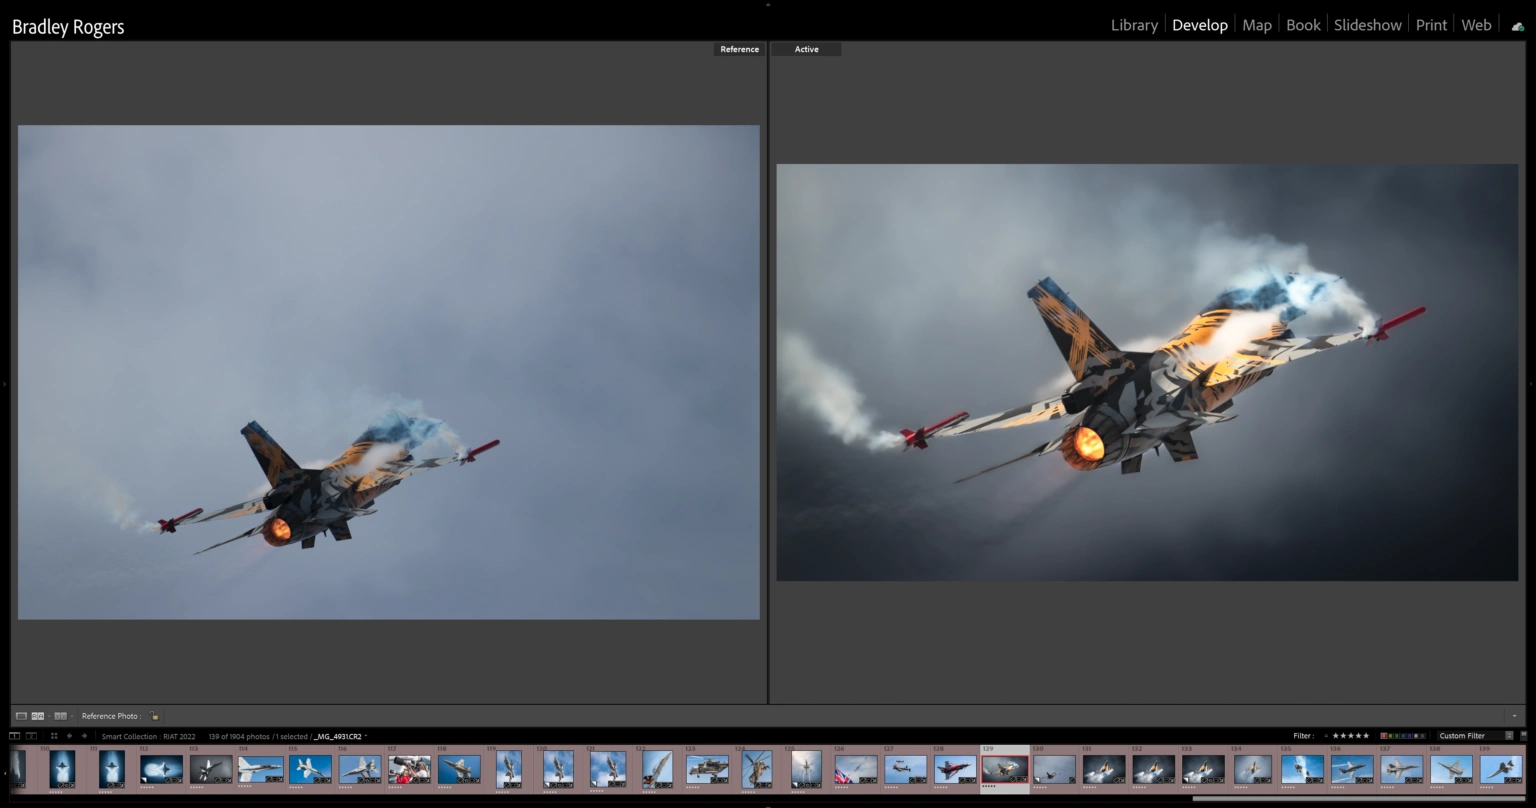
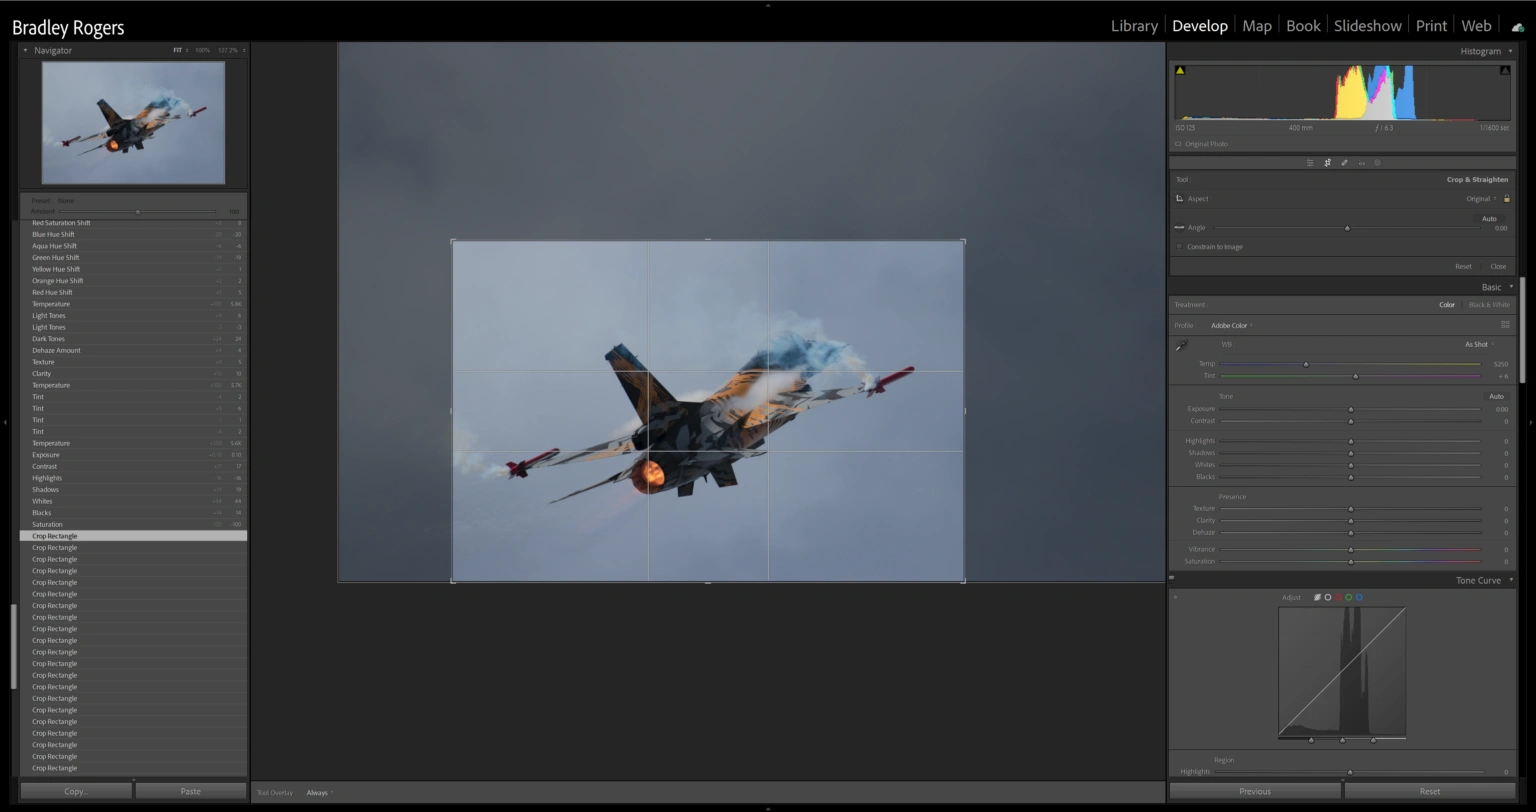
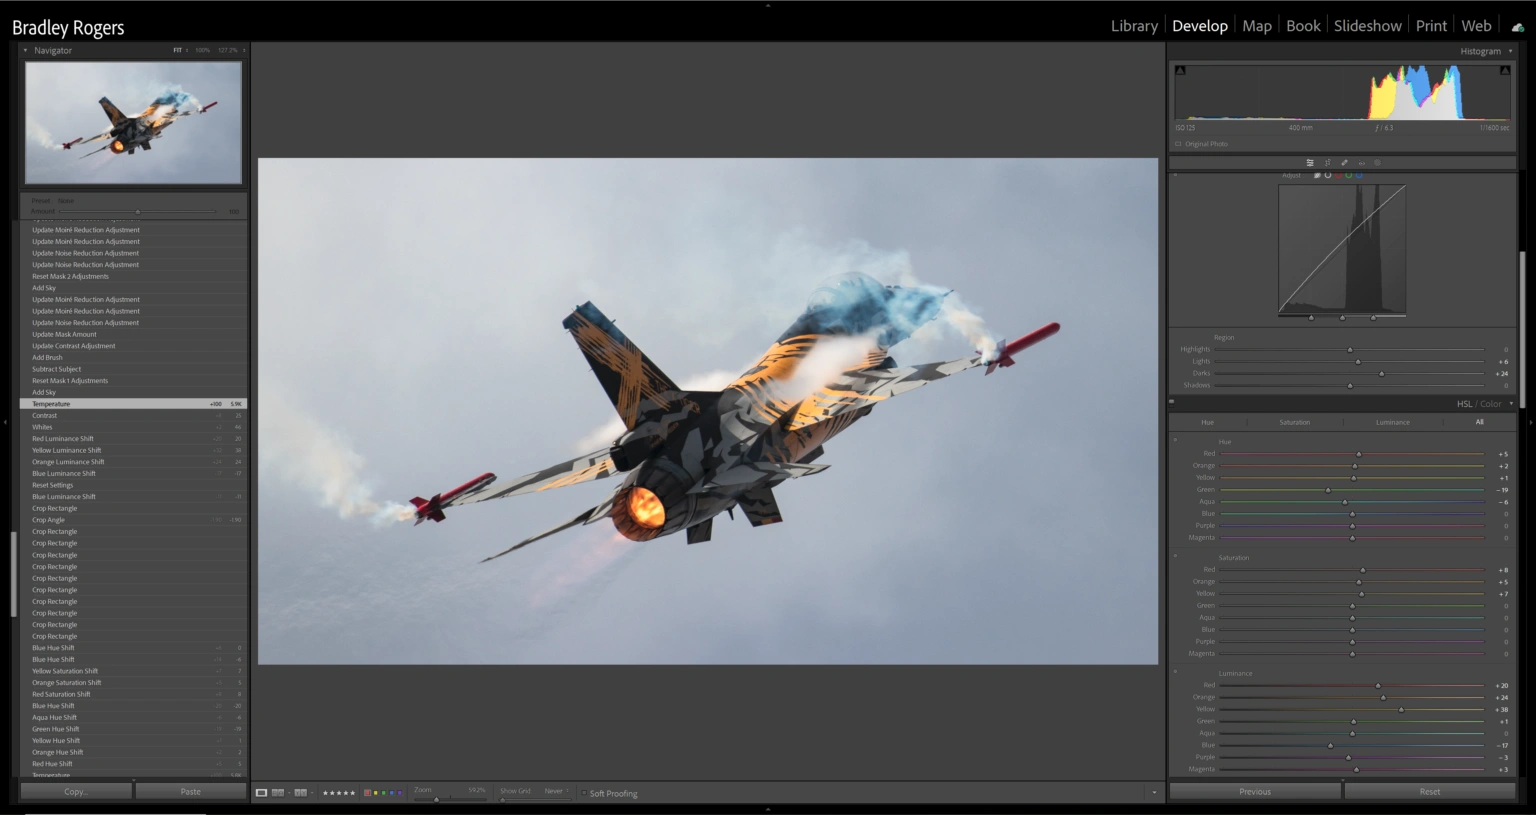
Once happy with desired composition, initially I used the 3:2, but later settling on a 16:9, which seemed to work well with the angle of the jet. I began working on the tones of the image, first dropping the saturation to -100 (a tip picked up from Tom, in the COAP training) allowing me to focus purely on tone, without the distractions of colour. I then set the Black and white points. Top tip to hold the “Alt” key when moving the sliders, this will show the clipping. Areas that turn black, are pure black and the details have been lost and areas that are white are blown out and have turned pure white, again the detail will be lost. There isn’t much, if any black in this image, so a small nudge was all that was require, +14 for the Blacks in this instance. As the image was a little dull or under exposed, the whites were more drastic at +44. Getting these sliders right, in my opinion is a massive part of making your image pop! The rest was followed up from there, rather than working down as Lightroom is setup. I restored the colour (double click on Saturation) before targeting the white balance.
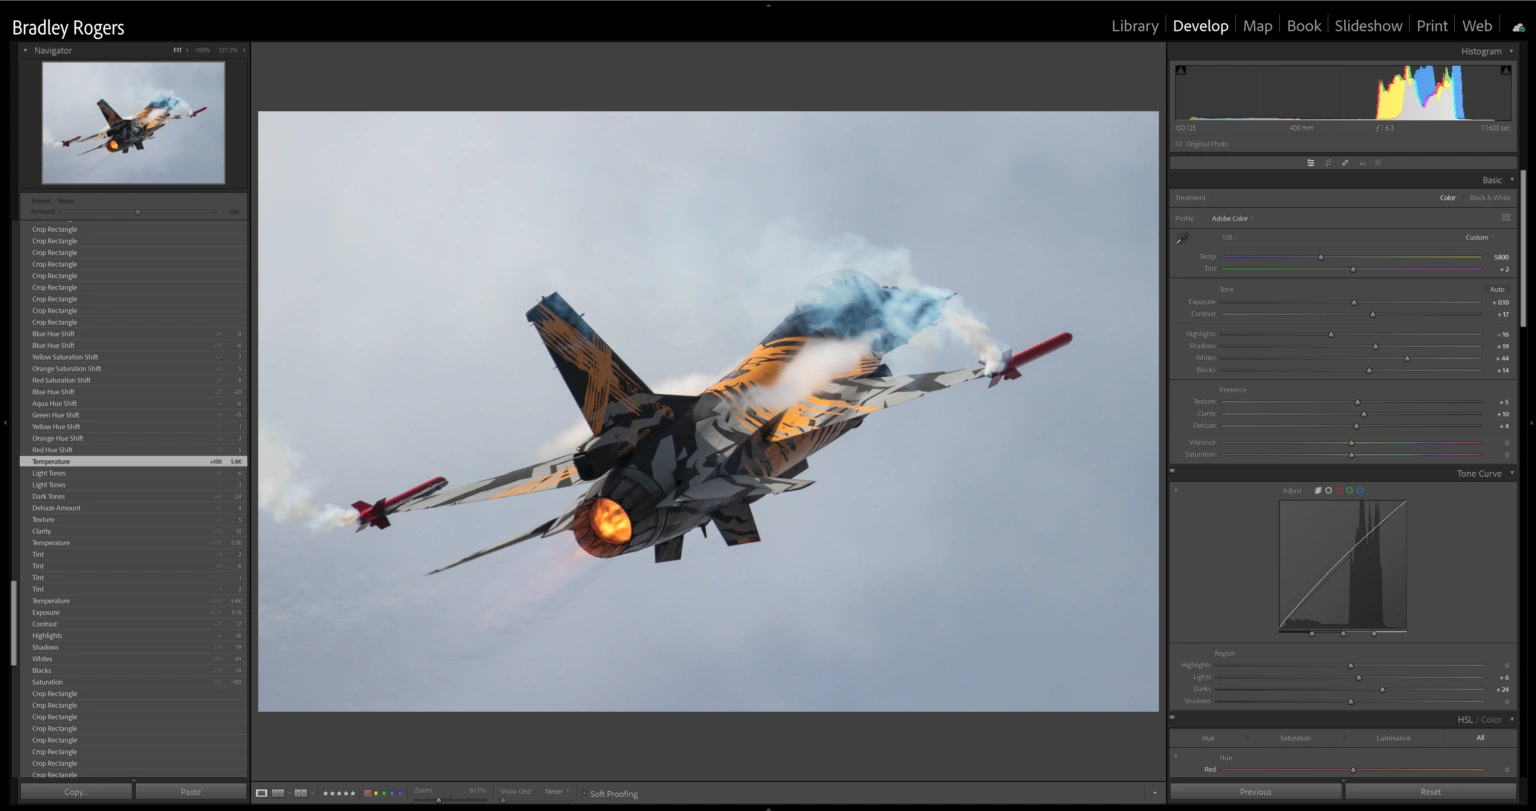
Now happy with that side of the tone panel, it time to target some of the more creative and enhancing areas of Lightroom. The heavy crop often exaggerates the “Digital Grain” of course this will happen even at base ISO’s, especially against a clean sky. So the texture slider is only going to make that more obvious, so a very careful use here. Clarity (targeting the contrast in the mid-tones) can go very wrong very quick, so again only a minor tweak +10 in this example. A bit of a fine tweak in the tone curve allowed for more pop.
I must stress at this point why I’ve included my history panel in the screen shots… because I change my mind! I’m a bit of a perfectionist, so I often go back, tweak and tinker away as I go, going back to previous steps. So as the edit progresses you’ll see tweaks in that panel, with cropping, even down to colour, that I’ve already covered in the previous steps.
Now for colour! using the HSL panel I worked though, this time, in order. Sometimes using the dropper to click and “pull” on colours in the image. I often take the sliders to the extreme to see what effect, if any, they have.
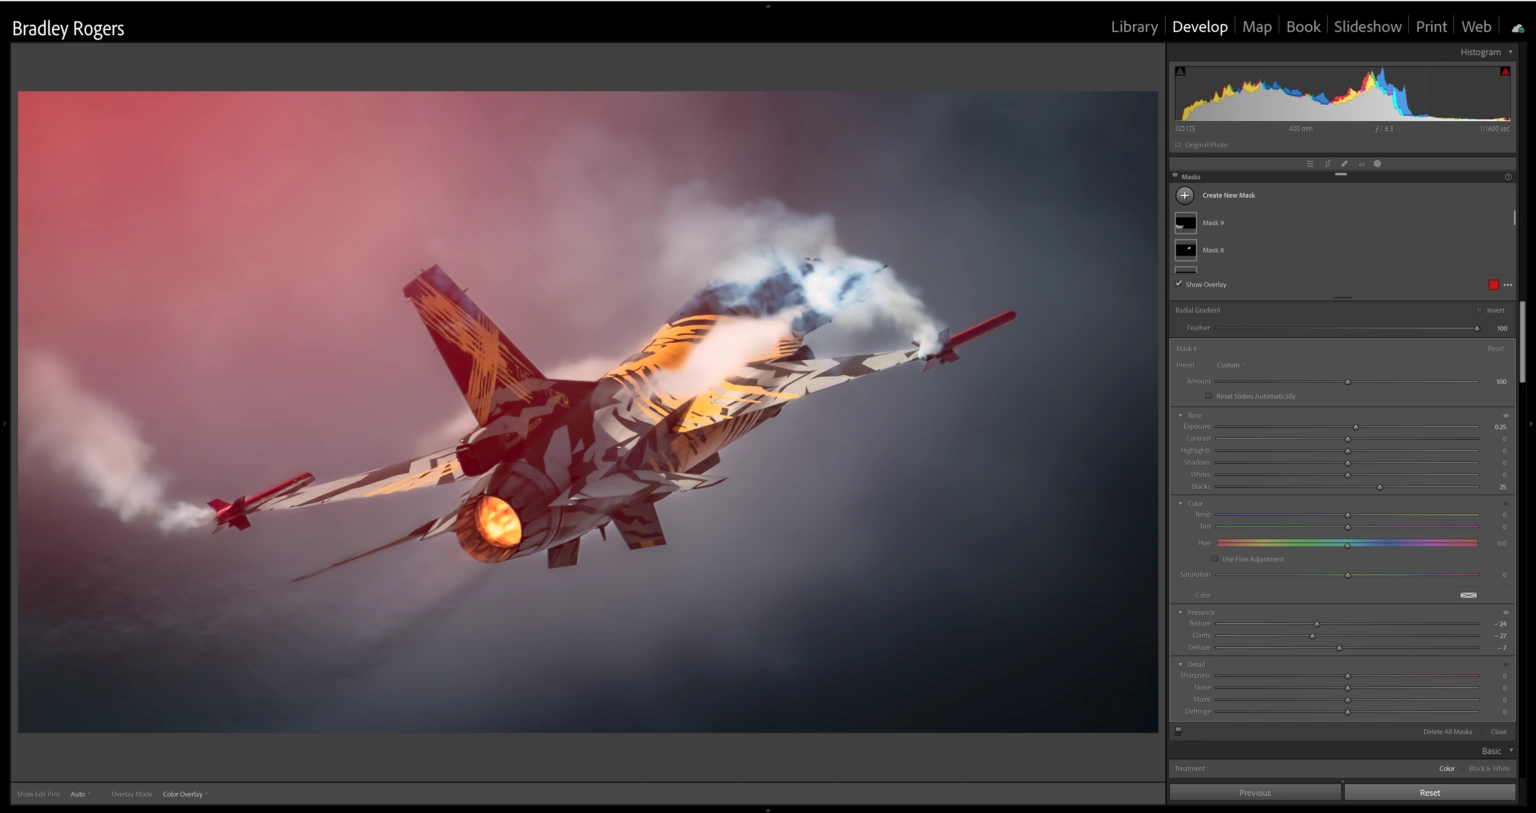
Now for the “Magic” part of Lightroom. And for those who know me and my workflow my favourite part. MASKING! Using Lightroom’s Ai functions I hit “Select Sky”, it did a pretty good job at the selection. This was easily refined with some brush work around the jet, to add the missed area. Also easily subtracted from parts of the subject, first using “Subtract from Subject” and then further subtracting with a brush. I have previously saved the adaptive Preset “Storm Clouds” as a Brush or Mask Preset, I find it best to make the selection with a mask using the overlay and refining before making the actual adjustments to the mask. So I selected “Storm Clouds”. At first this introduced a lot of noise both colour and luminance. So further refining was needed. As you can see though, it immediately took the image to the next level!
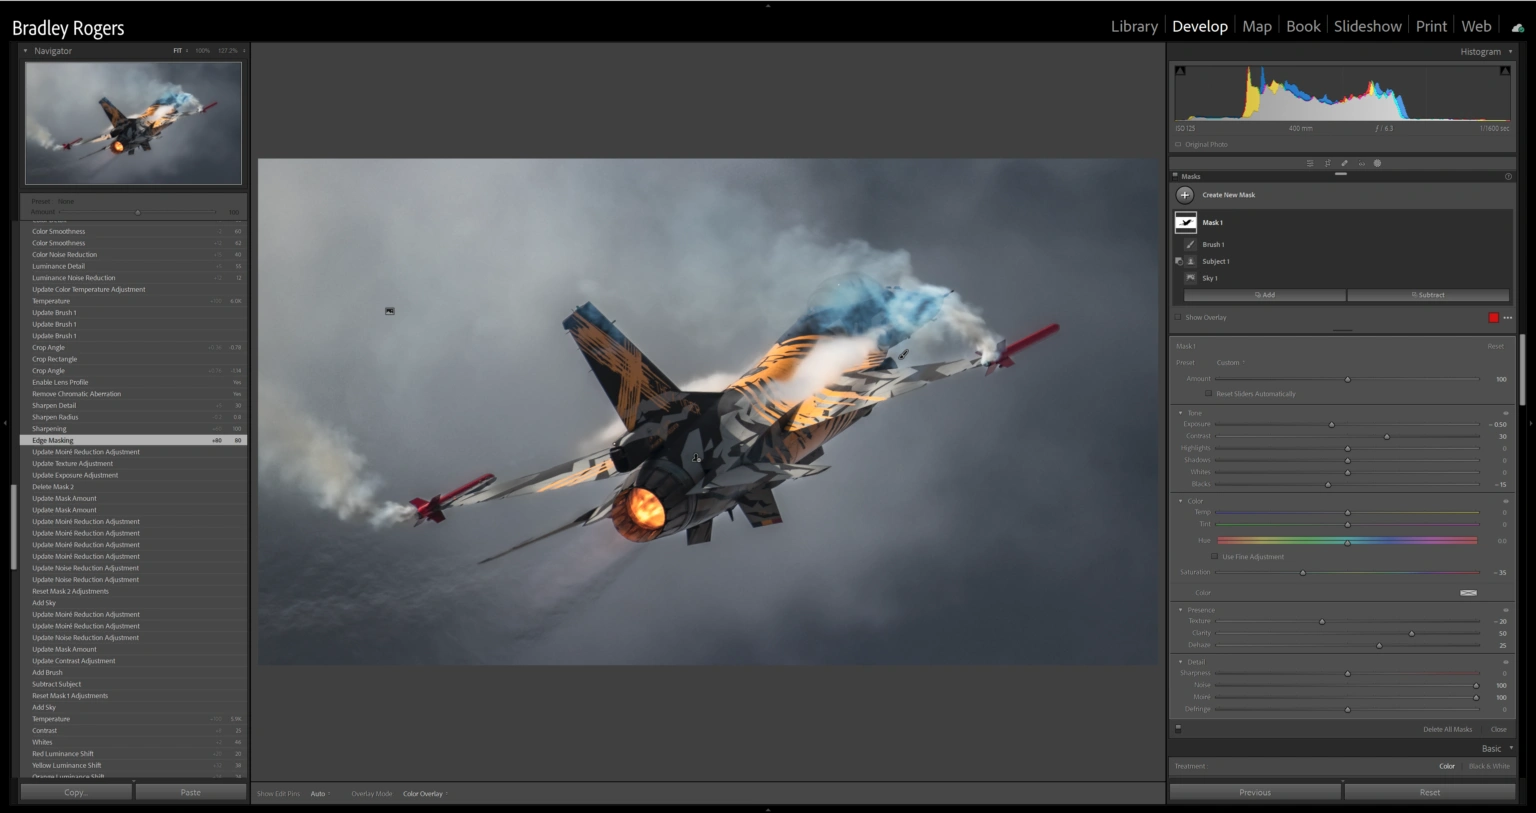
Next, enabling lens corrections and as mentioned noise reduction and sharpening. My main tip here is to get the Sharpening masking right again by holding the “Alt” key, this will bring the sharpening “forward” applying it to the edges where needed, rather than the sky, where this would add to the graining as I talked about above.

Now, the sky was still looking noisy. So I hit it with another select sky mask and refined. This one specifically for denoising the sky.
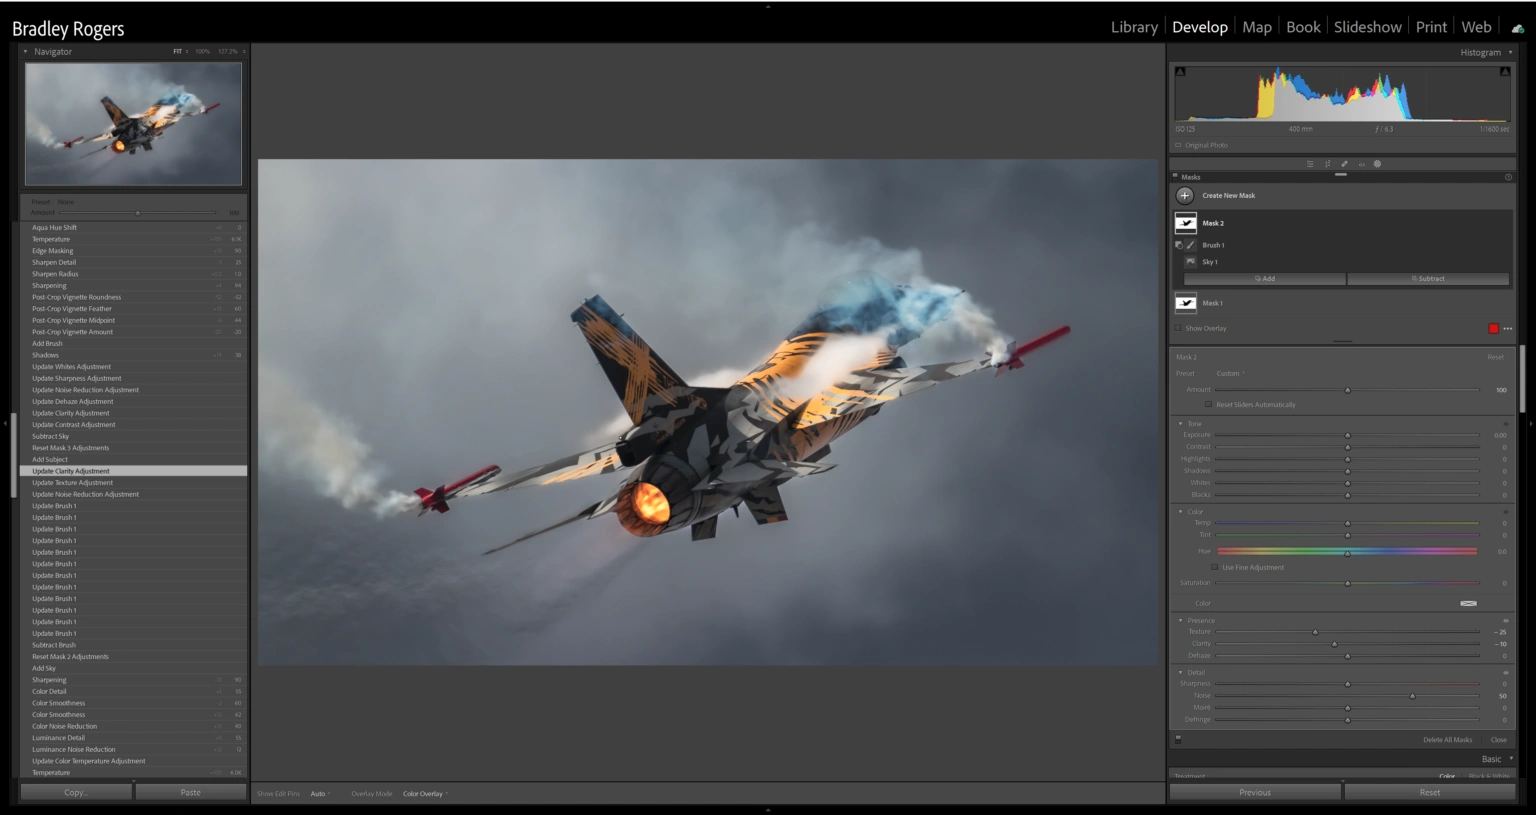
More masks… selecting the subject, again making sure to refine the selection, as its rarely perfect! Then, making minor tweaks to the whites of the subject, shadows and sharpening. Then a separate brush to work on the same. Also then adding a Vignette to add to the drama of the sky.
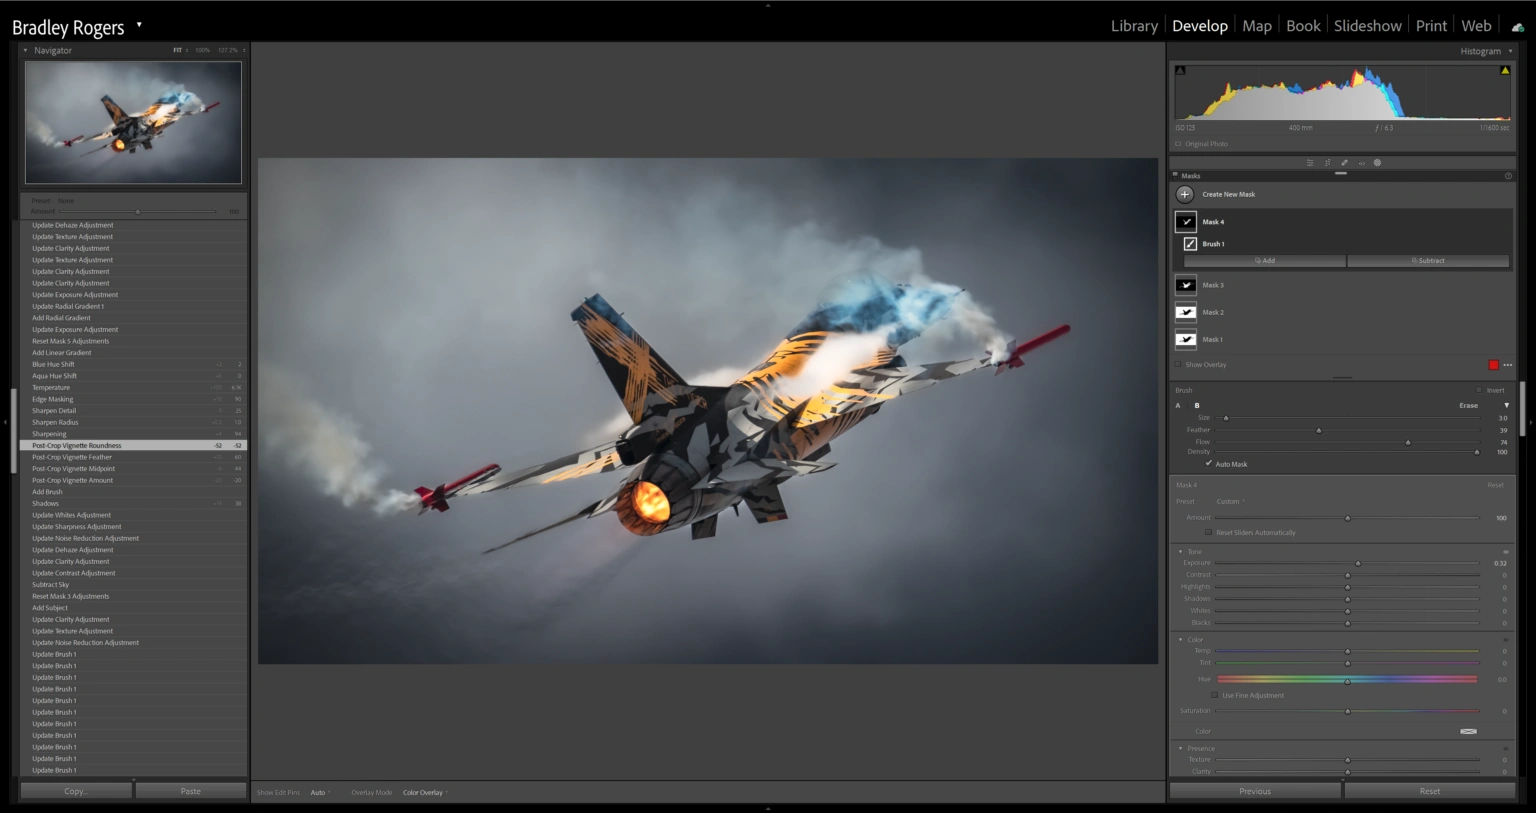
Now in the risk of this Blog going on and on… I’ll try wrap up here with bullet points with Masks 5-9 and hopefully the screen shots will explain all and the history panel fill any gaps I may have missed!
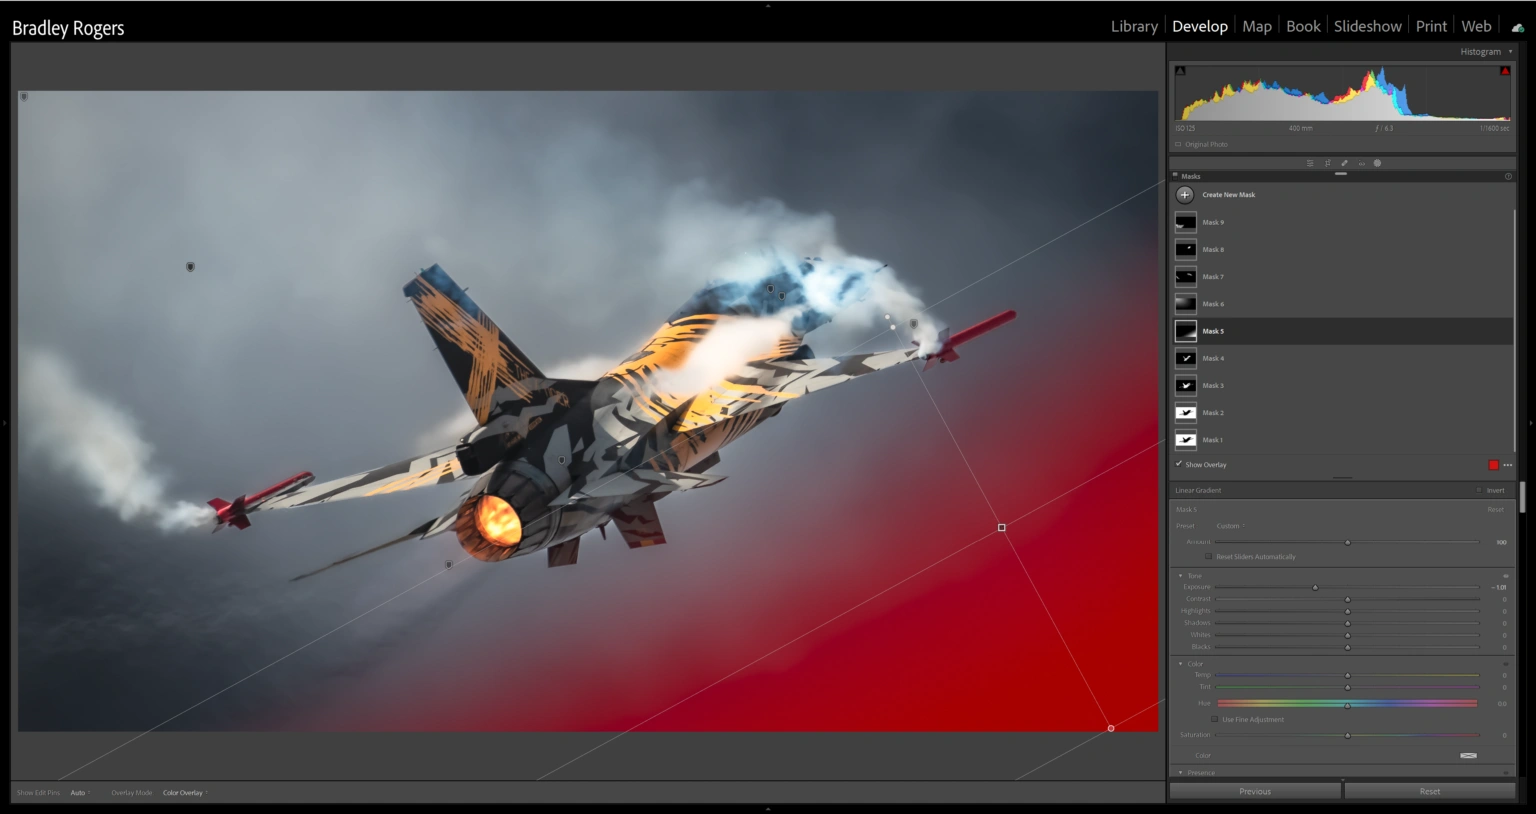
- Mask 5 a darkening gradient filter from the bottom right towards the jet, further adding mood to that sky.
- Mask 6 a larger well feathered radial to add some soft light falling from the top left towards the jet, by decreasing the clarity, texture and dehaze and upping the exposure slightly.
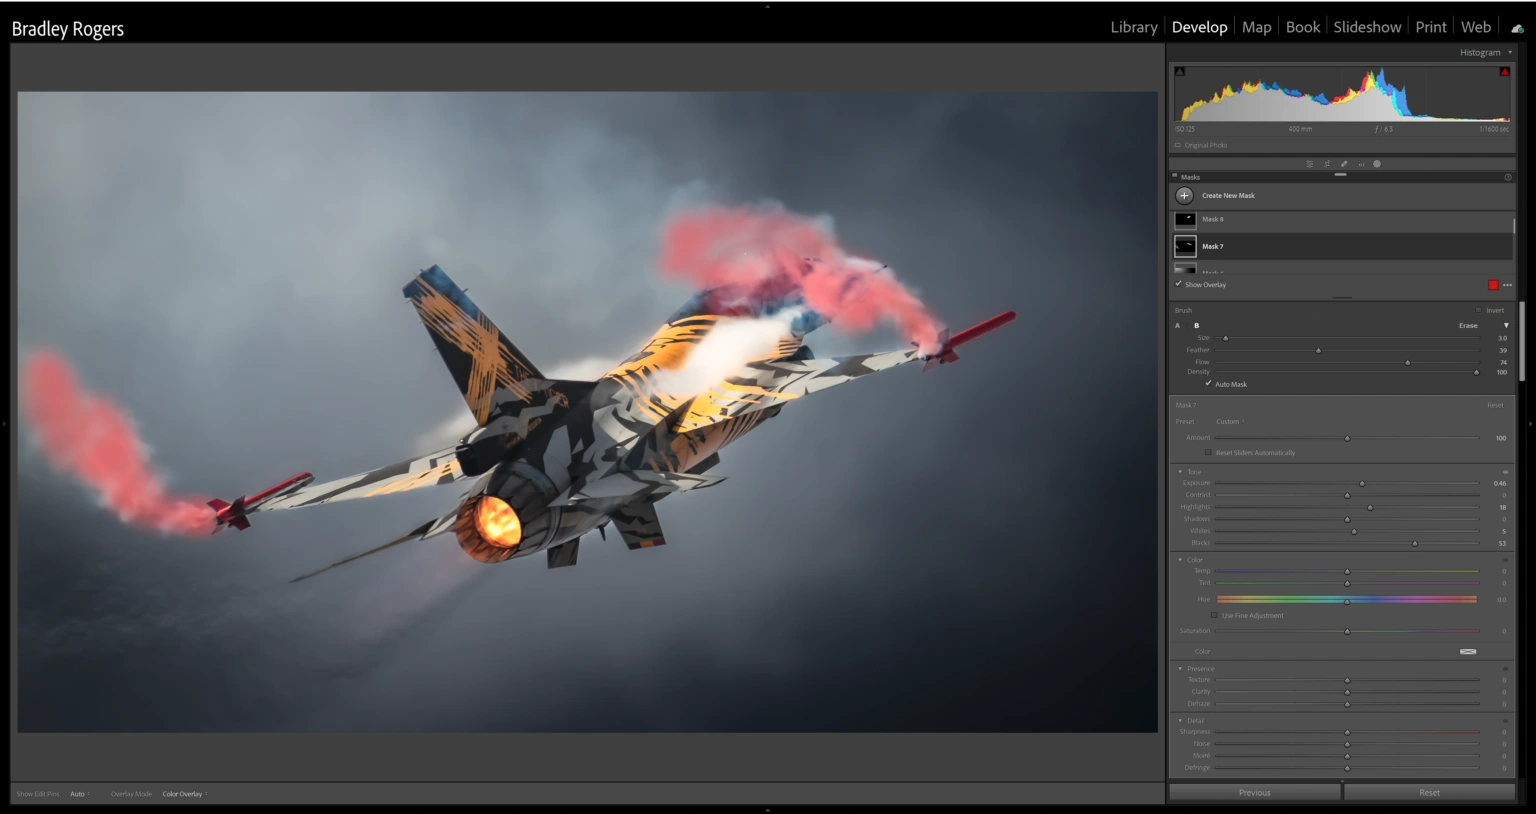
- Mask 7 a brush to the smoke to make it more white and less “dirty”, by upping the whites and reducing the saturation.
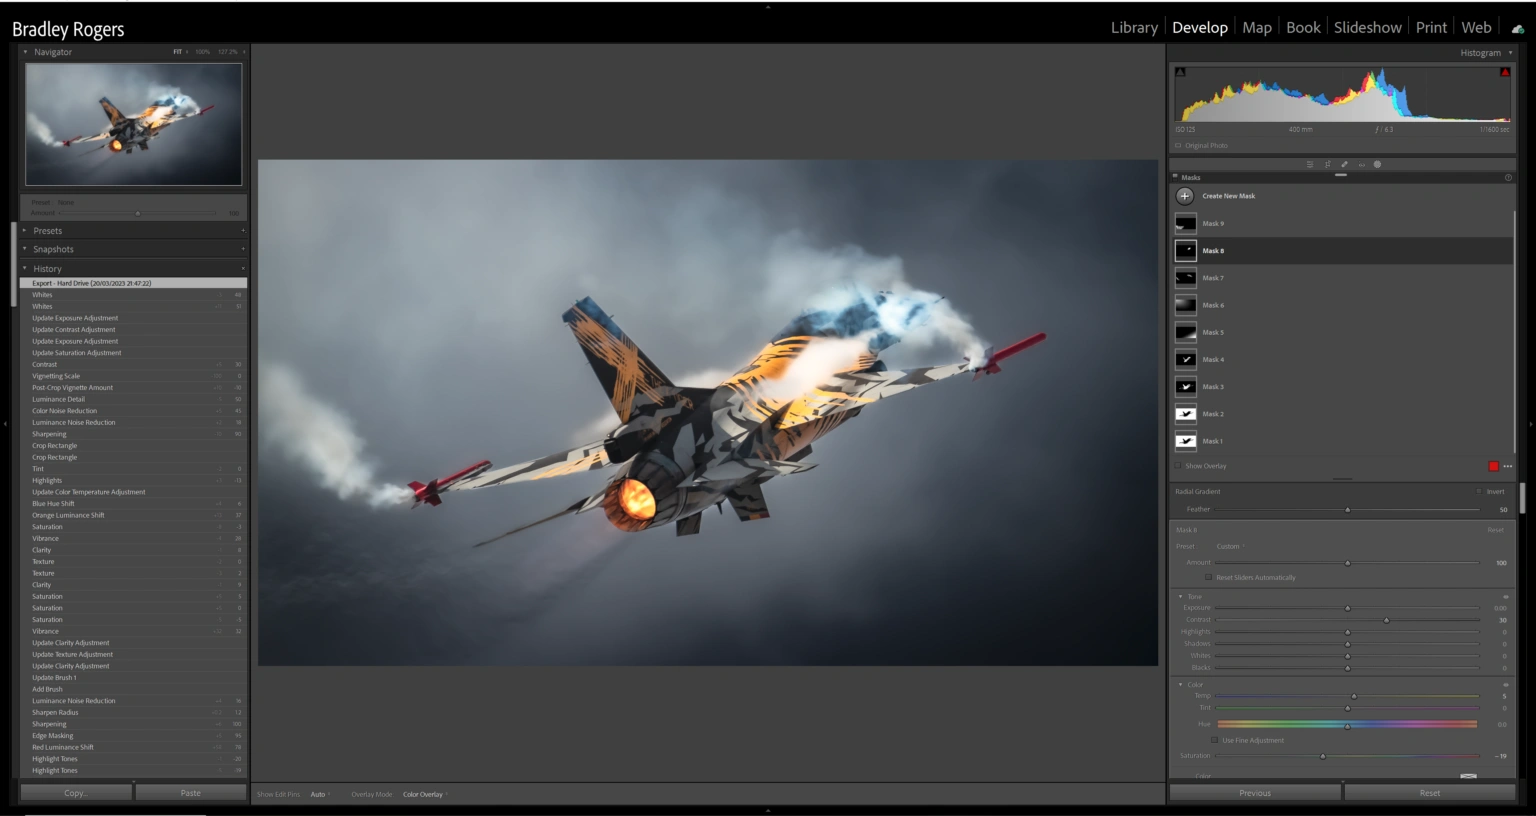
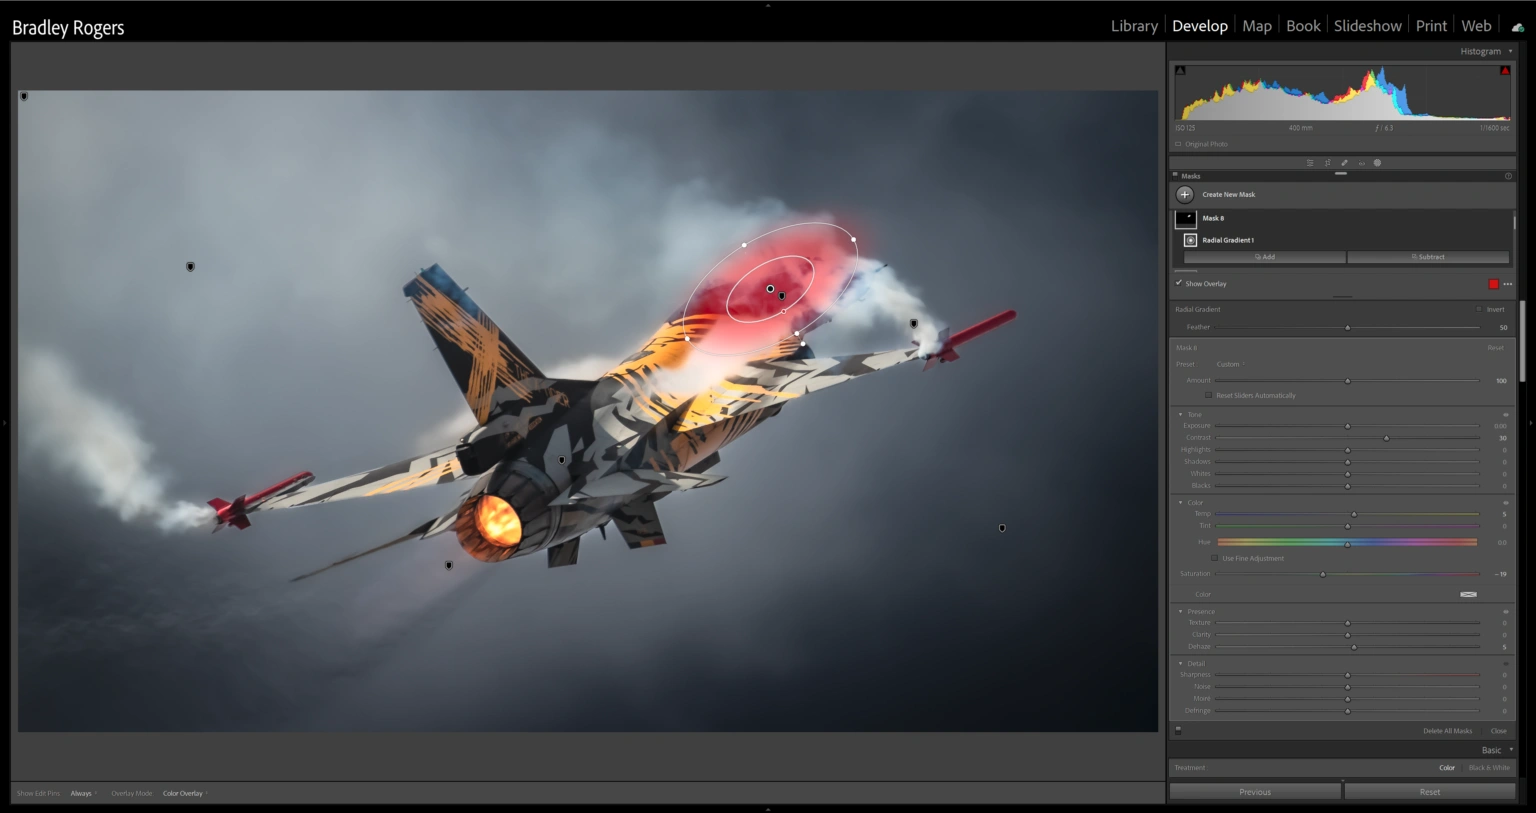
- Mask 8 a radial over the obscured nose and canopy, small amounts of dehaze and contrast to reveal it more from behind the smoke.
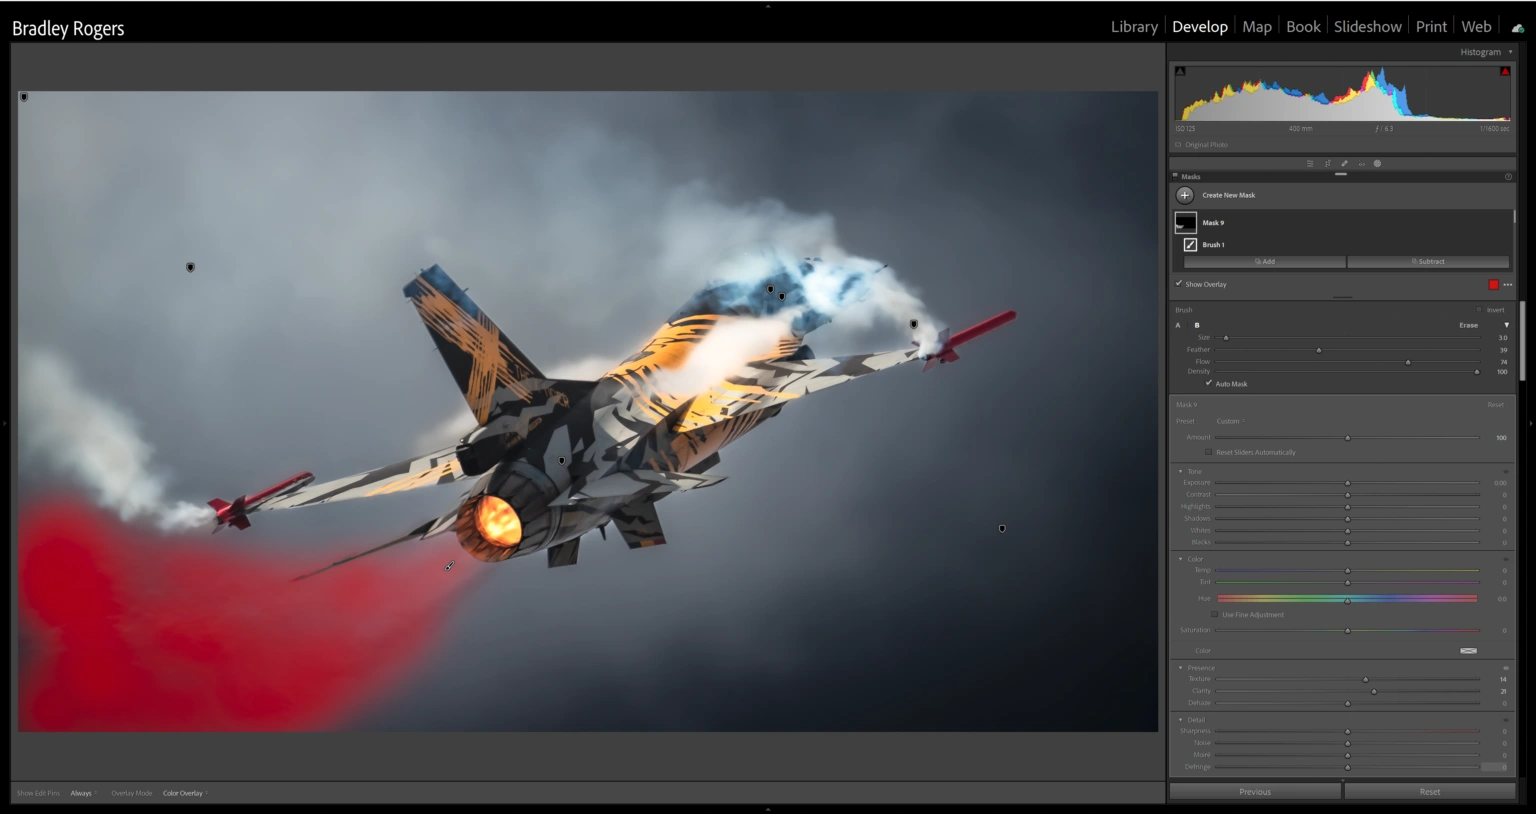
- Mask 9 brush to the Jet Wash/Jelly, adding texture and clarity.
And of course The final edited image as exported.

So if you’ve read this far, thank you! Hopefully it gives an insight into my head and thoughts when attacking an image such as this. Don’t be afraid to approach a creative edit! Who knows what lurks beyond the RAW file. Try it for yourself. And of course I’m happy to answer any questions on this edit or be on hand to help out if you would like to pick my brains or need help any time. Just give me a message.
Did you know our blogs are written exclusively by our members? We'd love for you to come and experience what COAP Online is all about!
Not yet a member?
Enjoy a free 30-day trial!
COAP Online membership brings 100s of aviation photographers from around the world together in a friendly, helpful and inspirational community. You'll enjoy monthly challenges, competitions, livestreams, blogs, exclusive discounts, meet-ups and more!
Get a free tutorial to your inbox every week!
Subscribe to our mailing list to receive a fantastic aviation photography tutorial to your inbox every Tuesday!
We hate spam as much as you. We will never sell your information, for any reason.