Heat Haze In Aviation Photography: Why Sharp Shots Sometimes Look Soft
Jun 15, 2026
Heat haze is one of the most common reasons aviation photos look soft, especially around our favourite areas of runways, taxiways and long-distance spotting locations.
It can be frustrating because the camera settings may be right. The focus may have been accurate. The lens may be sharp. Yet the final aircraft image still lacks sharpness and detail.
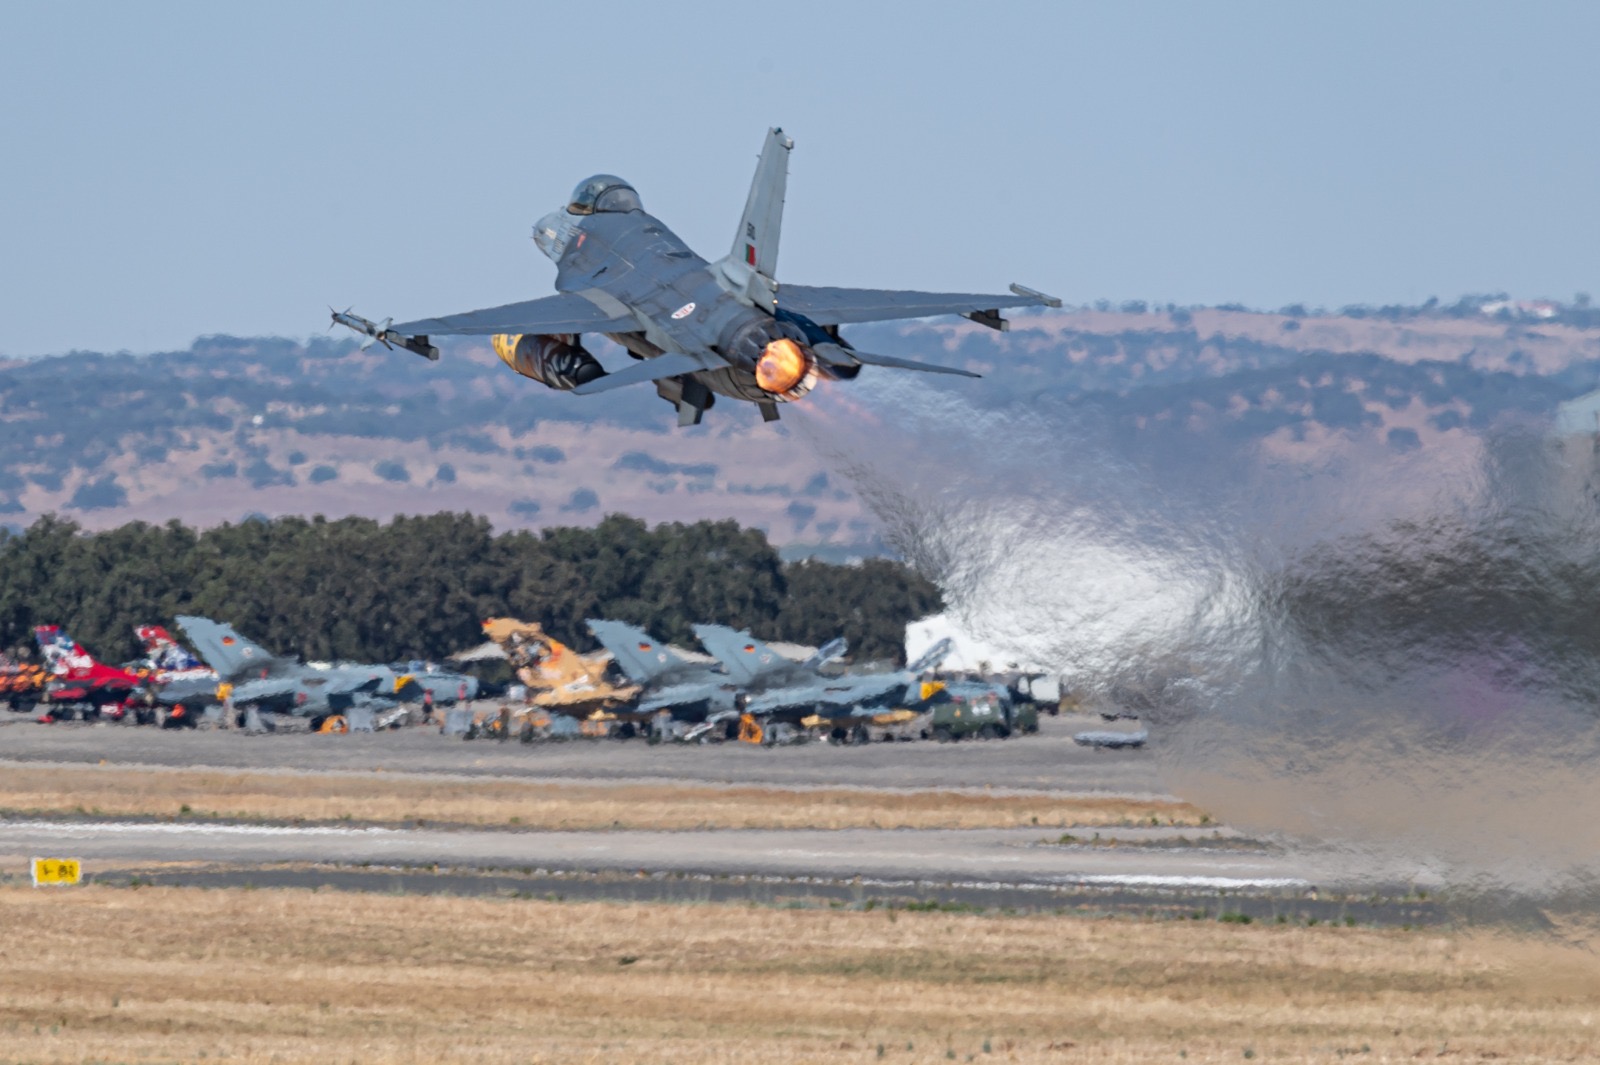
What heat haze does to aviation images
Heat haze happens when warm air rises from surfaces such as tarmac, concrete, grass, buildings or roads. That moving air bends the light before it reaches your camera.
For aviation photographers, this is a big problem because we often shoot long distances across exactly those surfaces.
The result can be aircraft that look melted, wavy or unevenly soft. Text, rivets, landing gear, canopy lines and tail markings may all lose clarity.
How to tell heat haze from missed focus
Missed focus usually creates a more consistent blur. Heat haze can often look patchy and some areas may seem almost sharp while others are not.
Look at straight edges. Fuselage lines, runway markings, tail fins and landing gear struts can look distorted rather than simply out of focus.
That distortion is the dead giveaway.
What can you do about it?
The best fixes usually happen in the field, because they are pretty much impossible to fix during editing. Yes, there’s great sharpening tools out there, but when there’s wobbly lines and no detail, that’s a real challenge.
Try to reduce the amount of hot air between you and the aircraft. Move closer if available. Change angle so you are not shooting across long stretches of tarmac. Wait until the aircraft is nearer. Shoot earlier or later in the day when the ground is cooler.
You can also change the goal of the image. Instead of chasing a tight, crisp aircraft portrait, shoot wider and use the shimmer as atmosphere to tell more of a story.
Sharpening can help a mildly affected file, but it cannot rebuild detail that the air has already distorted.
Inside COAP Online, we cover real aviation photography problems like heat haze in more depth. The Merge post for this Tutorial Tuesday shows a practical checklist for diagnosing heat haze versus focus error, and how to decide whether the file is worth editing. You can explore COAP Online with a free trial at www.coaponline.com.
Did you know our blogs are written exclusively by photographers inside the Accelerator? We'd love for you to come and see what COAP Online is all about.
Not yet part of the Aviation Photography Accelerator?
Start this month for £19
Every month the whole community locks onto one Focus Subject and learns it live with our pro instructors. You also get instant access to everything we have ever made: 30+ workshop replays, 150+ tutorials, four pro masterclasses, and The Merge, our private community of 500+ aviation photographers.
Cancel any time. 30-day money-back guarantee.

Included with the Accelerator
Exclusive gear discounts at Clifton Cameras
Everyone inside the Accelerator qualifies for exclusive pricing on cameras, lenses and accessories through our retail partner, Clifton Cameras. The saving on a single purchase can cover several months of the Accelerator.
Discounts available across









Get a free tutorial to your inbox every week!
Subscribe to our mailing list to receive a fantastic aviation photography tutorial to your inbox every Tuesday!
We hate spam as much as you. We will never sell your information, for any reason.